Order Baseline Environments
Overview
Baseline environments can be ordered through the Release Update Studio to test the customizations done by the customer.
Behavior of the Release Update Studio Navigator
Once the Release Update has been applied to the Customer Baseline Repository, the two buttons; "Impact Analysis", "Order Environment", and "Order Sanity" will be enabled in the Release Update Studio navigator (Figure 1.1).
 |
|---|
| Figure 1.1 - Navigator of the Release Update Studio |
However, the need to order a baseline environment occurs when the customization upliftment has been completed by following the steps in Apply Release Update to Customer Solution Repository and Customization Uplifting Process.
Order Baseline Environment from the Release Update Studio
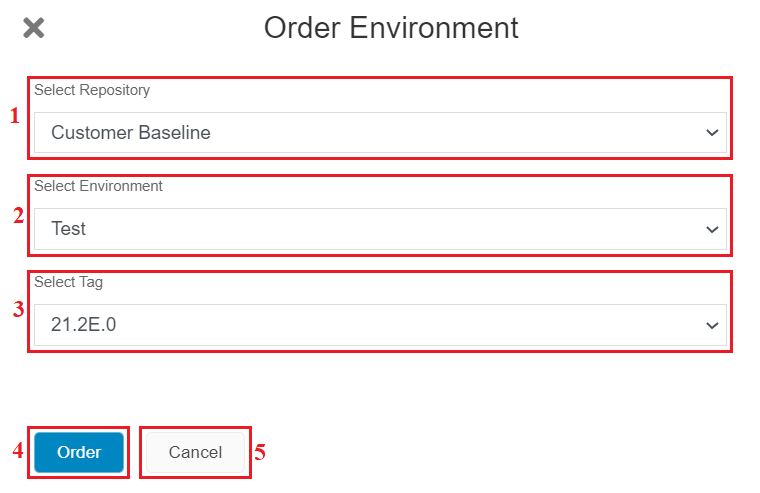
The "Order Environment" button on the navigator can be clicked to open the dialog box shown in Figure 1.2.
 |
|---|
| Figure 1.2 - Order Environment Dialog Box |
The dialog will display a set of dropdown menus from which the following parameters can be selected to proceed with the environment creation process:
-
Select Repository [1] - Set as Customer Baseline
-
Select Environment [2] - Set as Test
-
Select Tag [3] -
Note: If there is only one Tag shows, User can select the same and proceed.
If there are multiple options, the user should select the initial service update tag in baseline environment creation. Initial Service Update Tag would mean the the earliest service update tag. Example 1; 21.2E. 1 and 21.2E.2 - then 21.2E.1 should be selected. Example 2; 21.2E.2 and 21.2.0 - Then the 21.2E.2 should be selected as it is the earliest version. Selecting tags after the initial service update tag will fail the baseline environment creation.
Then, click on the "Order" button [4] to trigger the baseline environment creation pipeline. The "Cancel" button can be clicked to cancel the environment ordering process.
Once the environment order is successfully created, a toast message will be displayed on the bottom right hand corner of the Release Update Studio homepage (Figure 1.3).
 |
|---|
| Figure 1.3 - Toast Message to indicate the environment order request was successful |
The Effect on the Release Update Summary Table
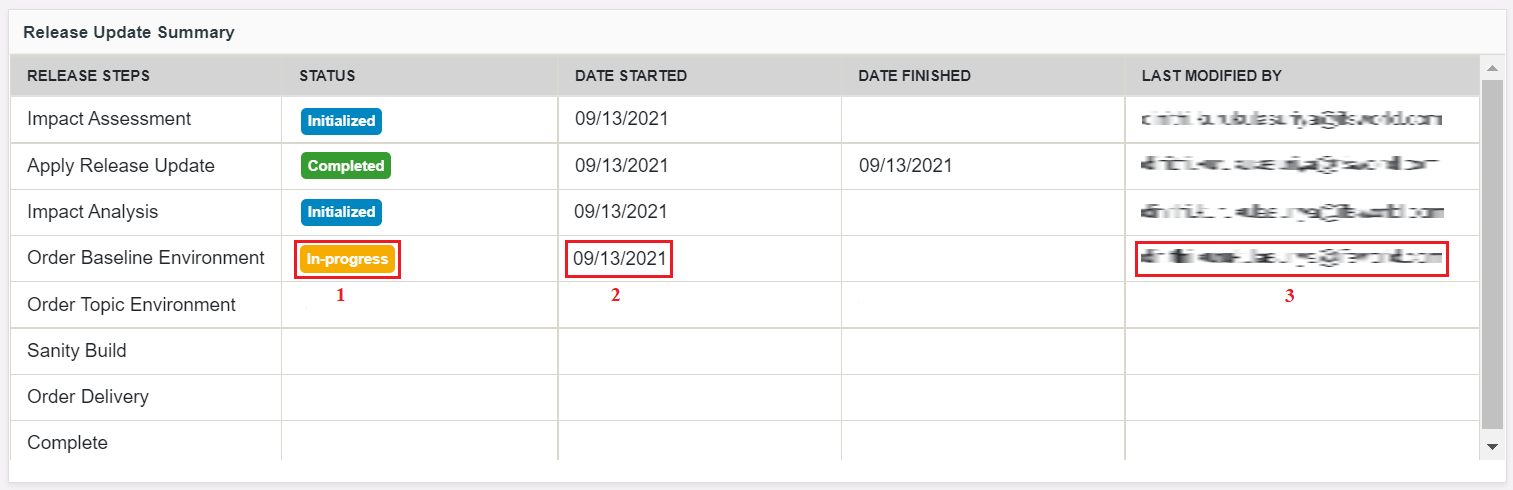
Subsequently, the columns of the record relevant to the "Order Baseline Environment" in the Release Update Summary table will be updated as follows (Figure 1.4):
- The "Status" column as "In-progress" [1].
- The "Date Started" column with date of triggering the baseline environment order [2].
- The "Last Modified By" column with the email ID of the user who triggered the job [3].
 |
|---|
| Figure 1.4 - Release Update Summary table updated with status In-progress |
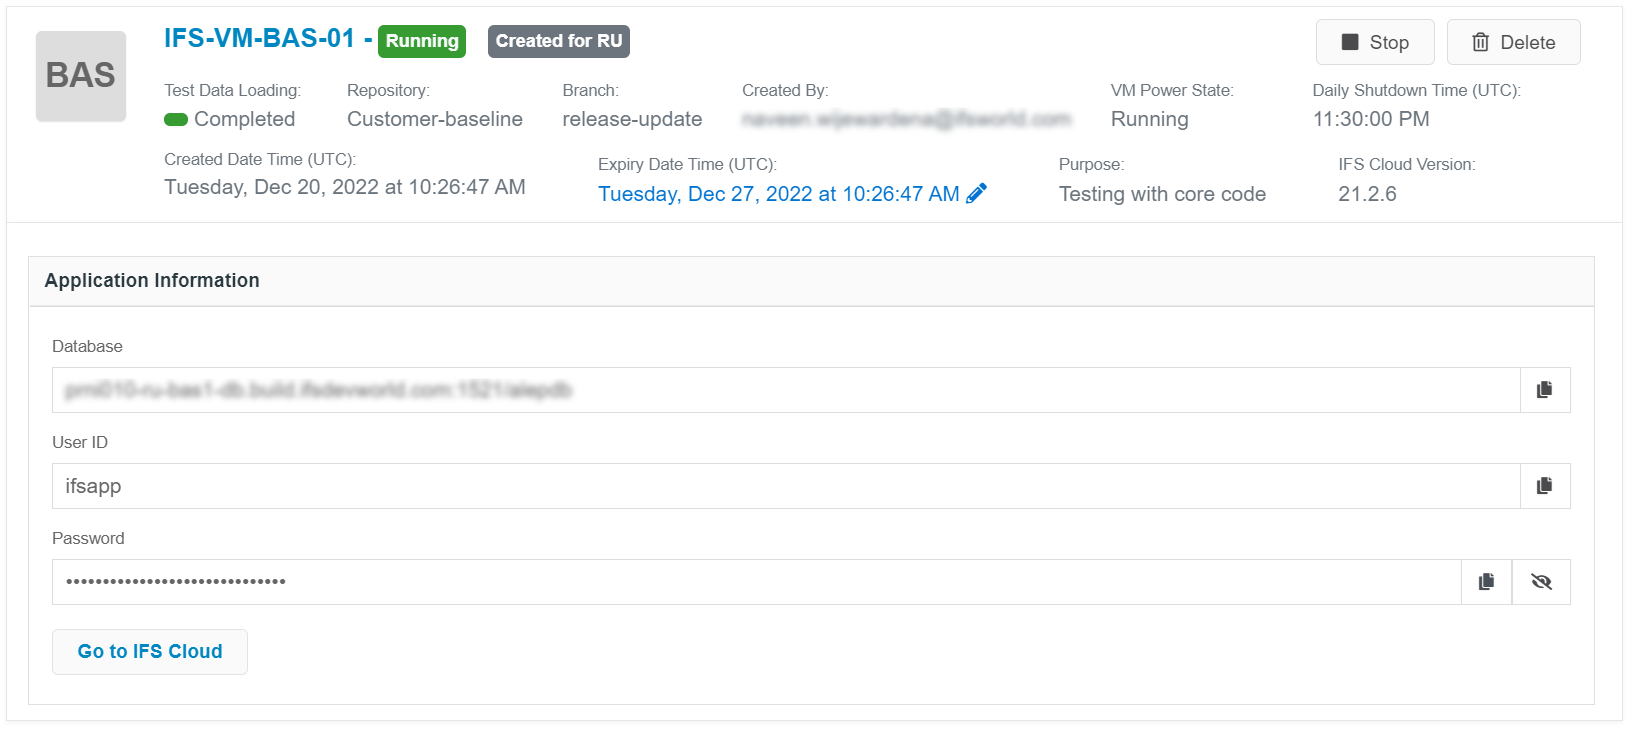
The build place environment quota is utilized at this stage and therefore a Baseline Environment card is created with the status as "Pending" (Figure 1.5). This card created can be viewed in both the Build Place view and the Release Update Studio view.
 |
|---|
| Figure 1.5 - Environment Card created with satus Pending |
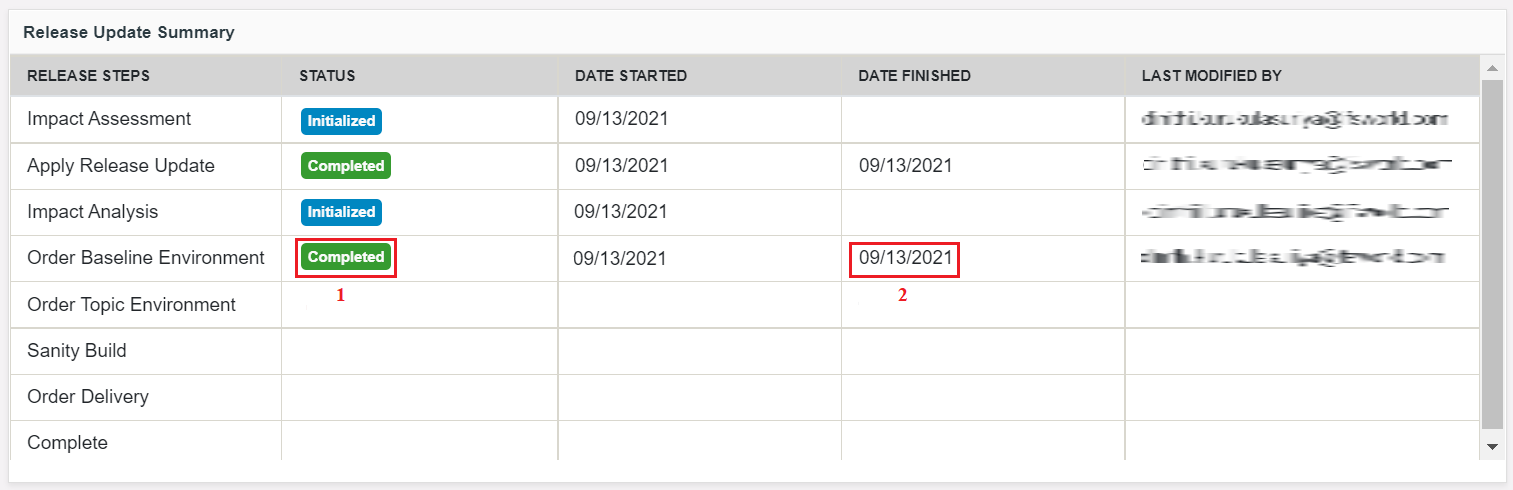
Once the baseline environment creation job successfully completes, a baseline image will be created alongside the baseline environment in Azure.
The Release Update Summary table will be updated as follows upon successful completion (Figure 1.6):
- The "Status" column as "Completed" [1].
- The "Date Finished" column with date of completing the pipeline job [2].
 |
|---|
| Figure 1.6 - Release Update Summary table updated with status Completed |
The Baseline Environment card will update its status to "Running" along with the pipeline job completion (Figure 1.7).
 |
|---|
| Figure 1.7 - Environment Card created with satus Completed |