Watermarks
Watermark feature enables a Report Designer layout work with a background image. Any supported image type can be placed as an under layer for a layout with the possibility to set the size and the position if the image. When you place a Watermark on a layout it will repeat in all three page sections and works in both flow and static areas. You are able to configure the image size and position it should appear on the layout.
How to add a Watermark
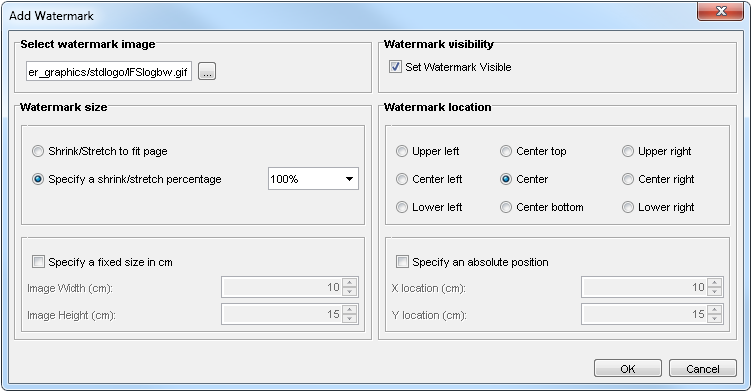
Watermarks can be added from the Page menu using the "Add Watermarks" sub menu. Once you added the watermark to a particular layout, you are allowed to Edit or Delete the watermark from the Page menu itself using "Edit Watermark" and "Delete Watermark" respectively. Following shows the dialog for Add Watermark.
You can add the watermark by browsing for the image you want to place as the background watermark. Once the image is selected and added to the layout, the image is copied to the root level of the "report_designer_graphics" folder in your Report Designer tool installation. The same image should be available at runtime in the application server. Refer How to configure Watermarks in runtime for more details.
Once the image is selected from the dialog, any of the given options can be selected as the watermark size and the location.
Positioning the Watermark
Position of the watermark on the report can be set from options under "Watermark location" section. You can select the position from one of the predefined positions or it's also possible to specify the absolute position by selecting the "Specify an absolute position" checkbox. Once you selected this option, the two sliders will be enabled to set the location in cm. Here the base position will be the upper left corner of the layout.
Managing size of the Watermark
Size of the watermark image can be changed by using the three options given under "Watermark size" section.
- Shrink/Stretch to fit page
Watermark image size will be stretched or shrink in order to fit the page size. In other words background image height and width will get the page height and width respectively and the entire page will be covered with the background image. One thing to keep in mind is that the watermark will be distorted if the image is too small when stretched to fit the page. So it's always good to keep in mind of the dimensions of the image when choosing this option. The following shows an example of such a case.

- Specify a shrink/stretch percentage
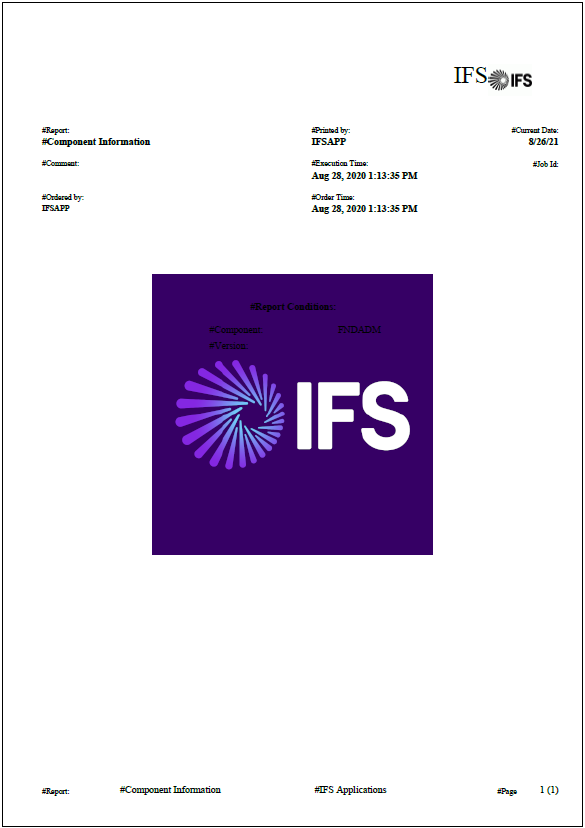
This option keeps the image aspect ratio and resizes the image in terms of percentage. 100% keeps the original image size and 200% doubles the size of the image. As this option preserve the image's aspect ratio, image distortion is not there or at a minimum level depending on the original image size. The following image shows an image sized at 200% and centered to page.
- Specify a fixed size
This option allows the user to specify the size of the background image in centimeters. When you select the option the two sliders will be enabled to set the size in 'cm'. The following image is set to use width = 12cm and height = 15 cm, and location as the "Upper right corner".

How to configure Watermarks in runtime
After you add a watermark the image is copied to the root level of the "report_designer_graphics" folder in your Report Designer tool installation. In order for the image to be available at runtime PDF generation, the same image should be copied to the root level of the "report_designer_graphics" folder which is under the folder specified in the System Parameter "Base path for Report Designer graphics on the application server".