Ordering Deliveries
Delivery Creation and Deployment Process
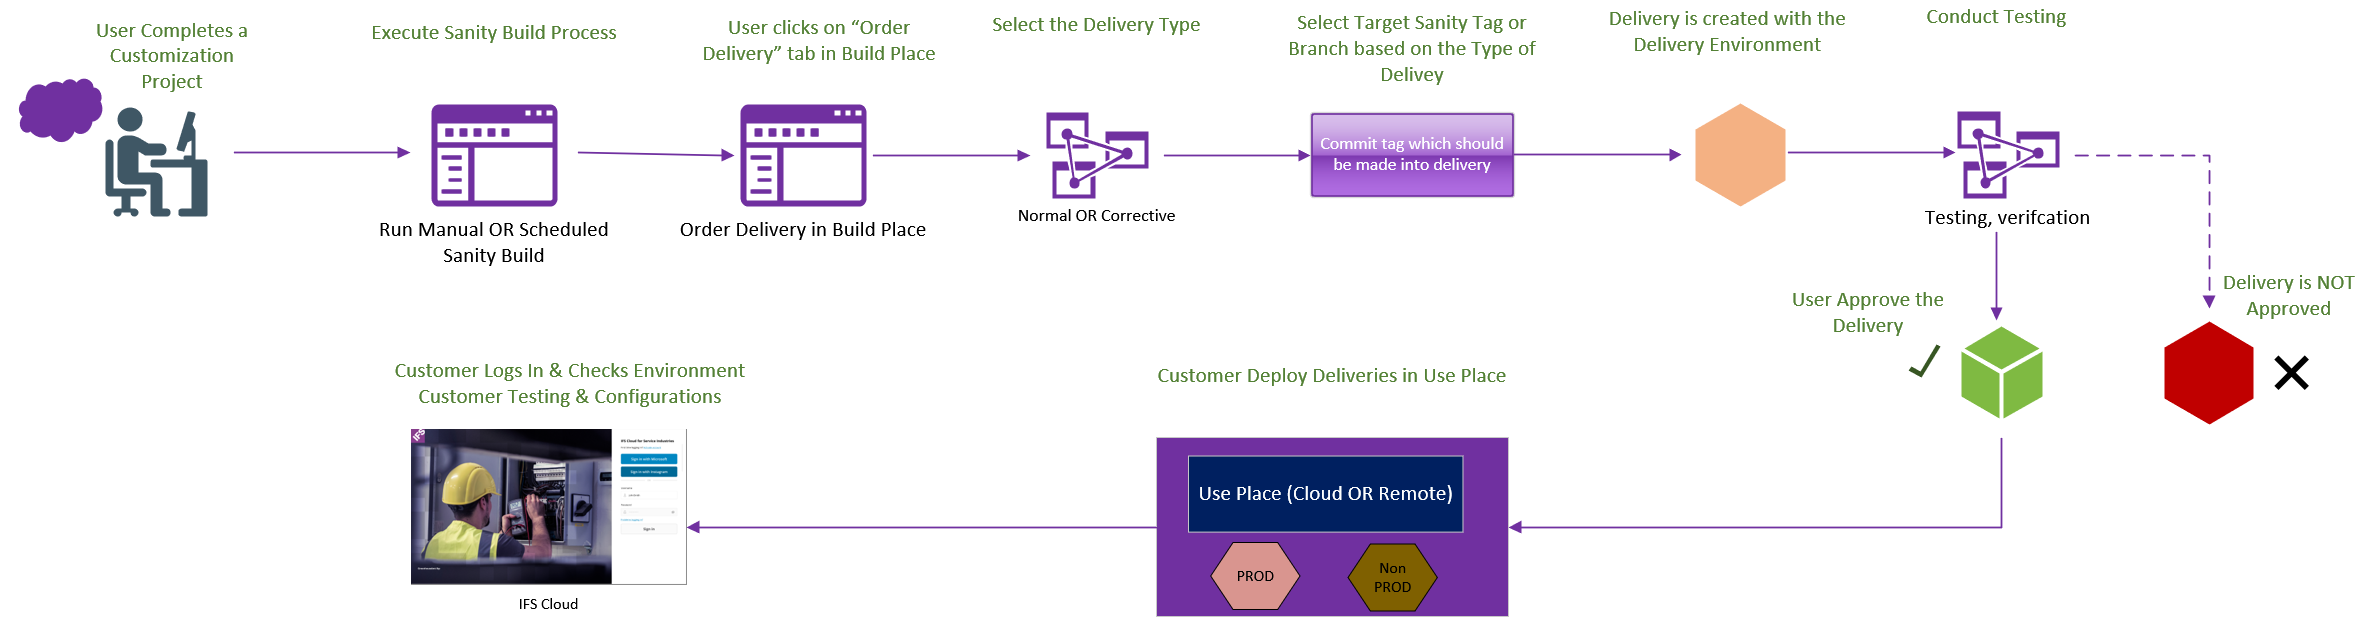
Below diagram depicts the process of Delivery Creation and Deployment in Use Place.
Prerequisites
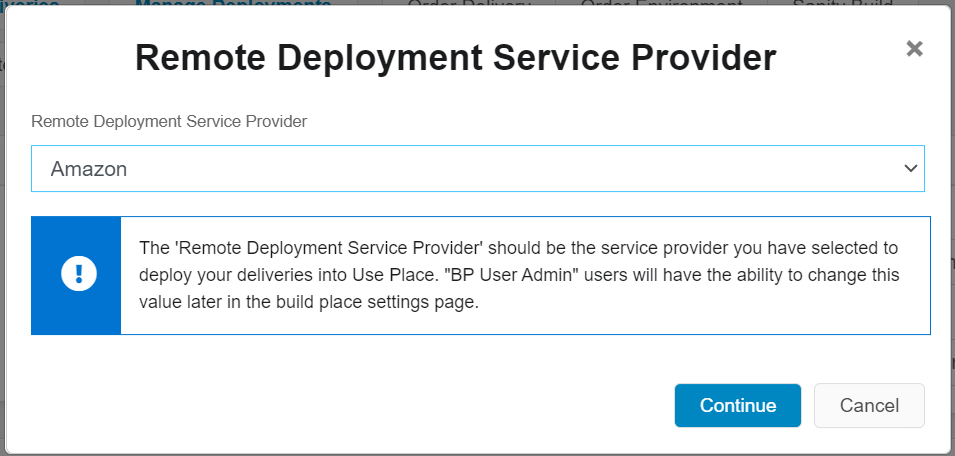
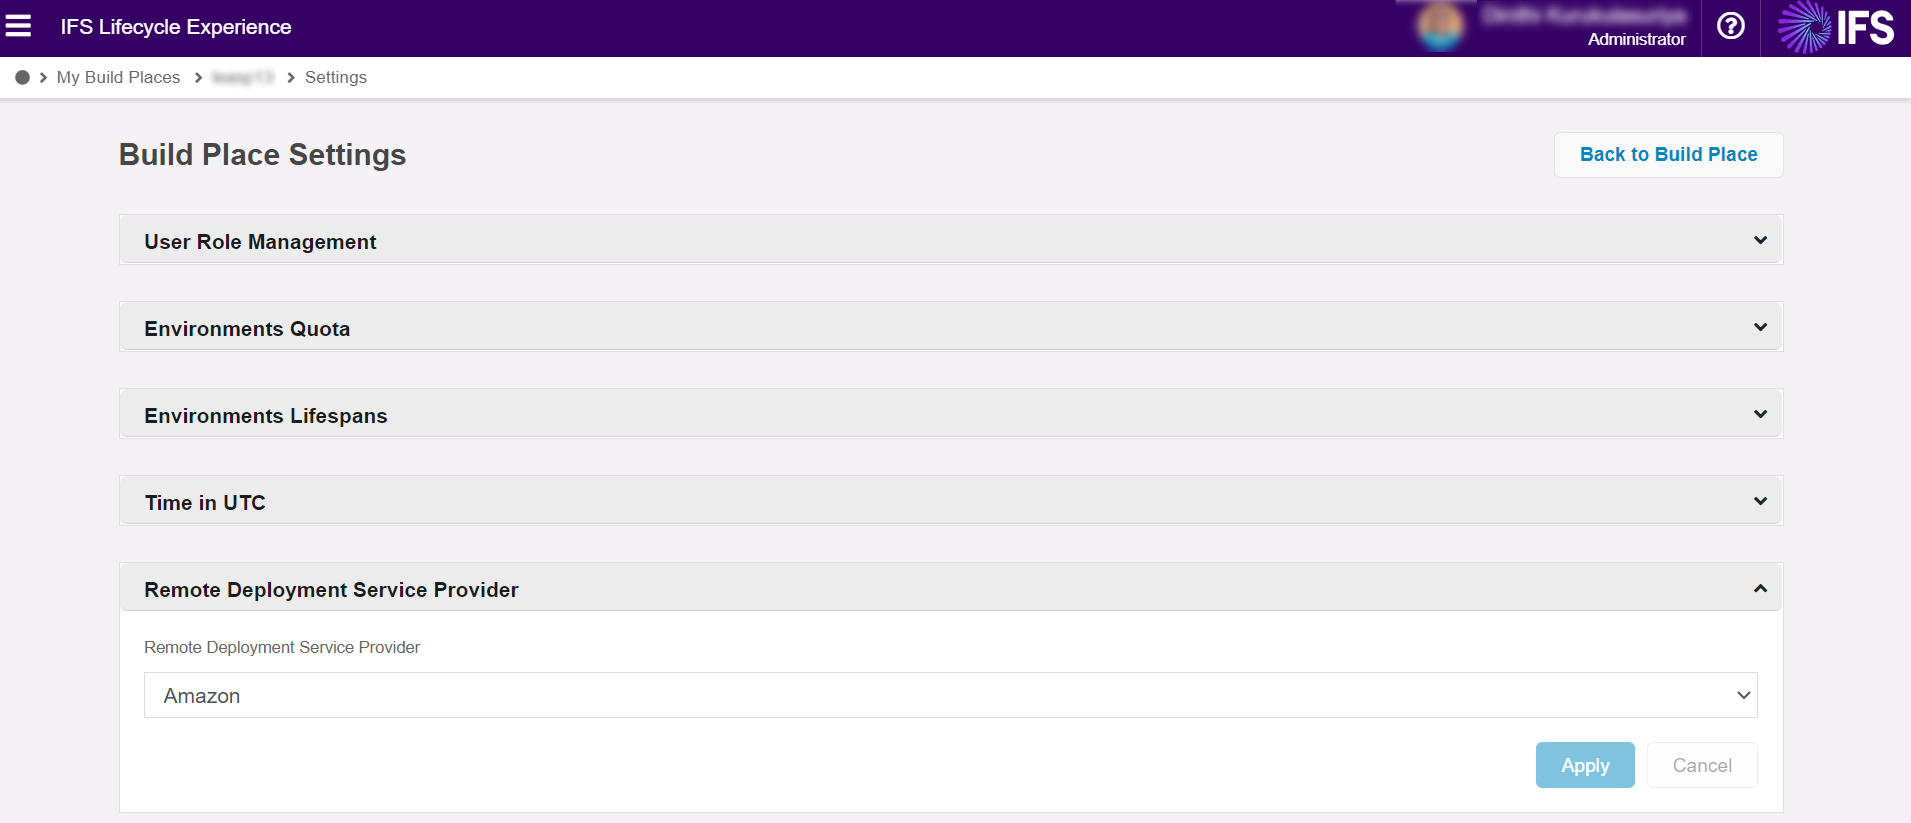
For customers who have chosen the remote deployment model, prior to ordering the first subsequent delivery, it is required to set the Remote Deployment Service Provider. The 'Remote Deployment Service Provider' should be the service provider you have selected to deploy your deliveries into Use Place.
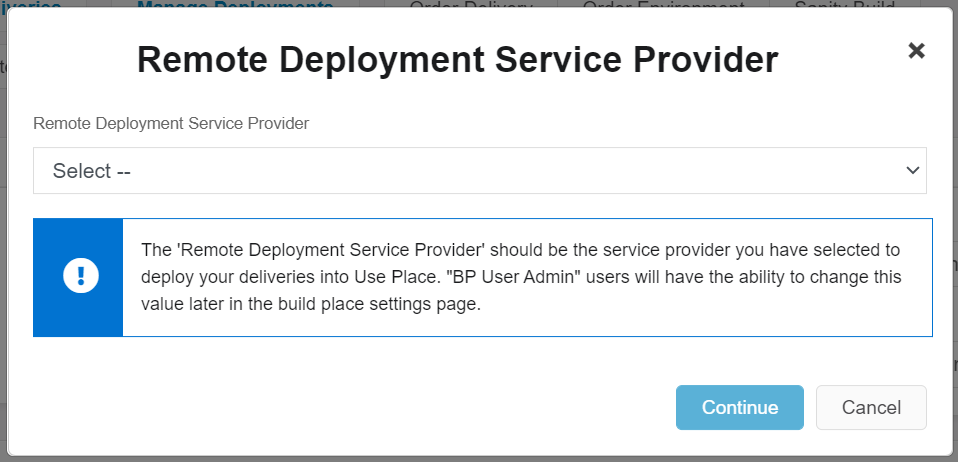
Note
The selection of 'Remote Deployment Service Provider' does not have an impact on delivery installation files or any delivery related process. The selection is for build place internal reference only.
Once the value is selected, it will be shown in the 'Order Delivery' dialog as a read-only value.
Users with BP User Admin permission will have the ability to change this value later in the build place settings page.
Delivery Creation
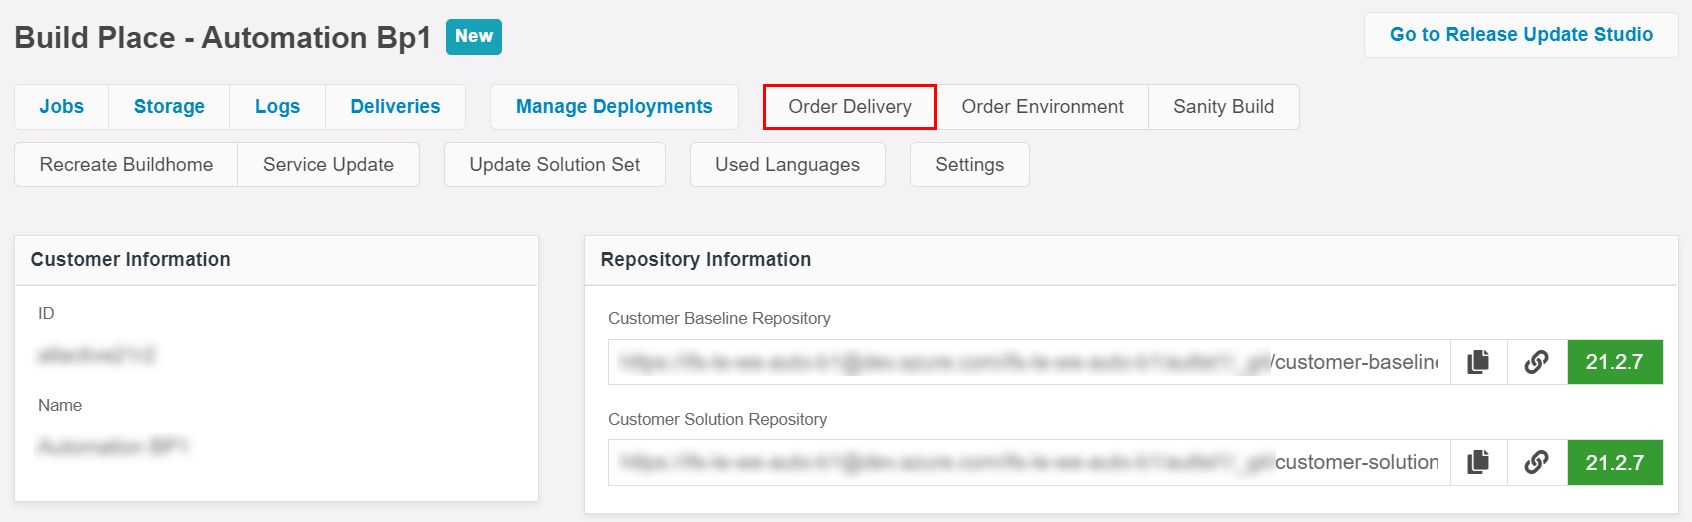
To order a delivery, from the IFS Lifecyle Experience portal, go to a Build Place and select 'Order Delivery' (Figure 1.1).
 |
|---|
| Figure 1.1 - Oder Delivery button |
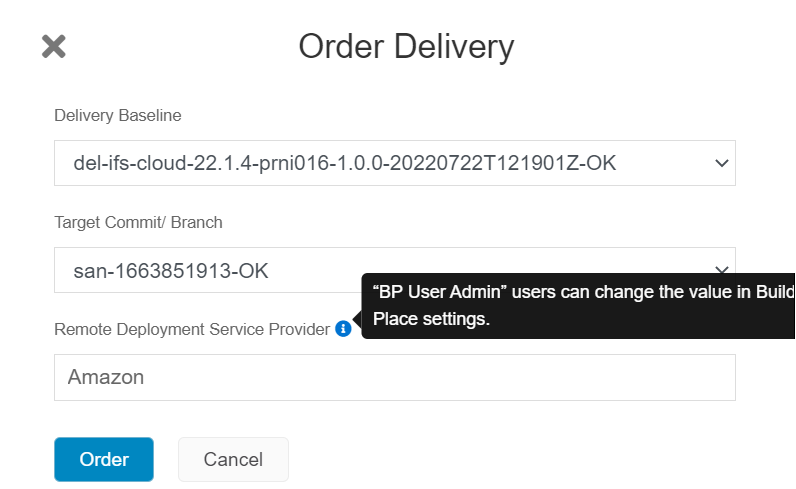
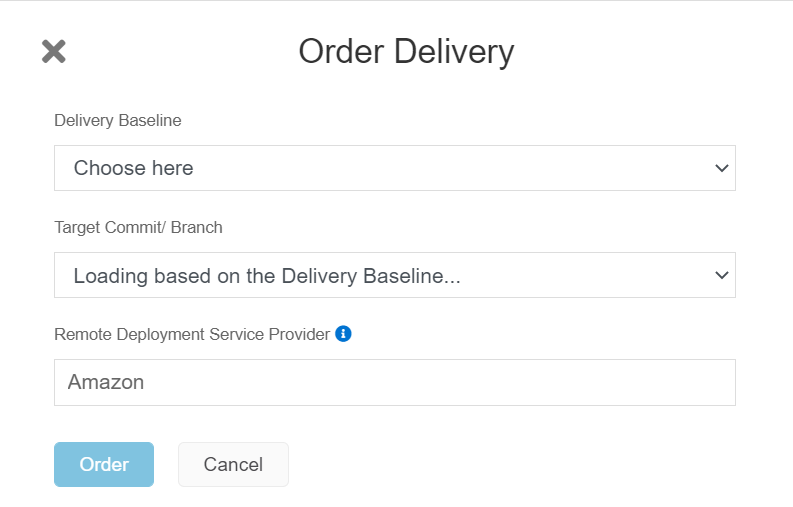
A side panel will open. It will have three fields that need to be set in order to order a delivery (Figure 1.2).
 |
|---|
| Figure 1.2 - Oder Delivery dialog-box |
The following parameters needs to be provided when ordering a delivery.
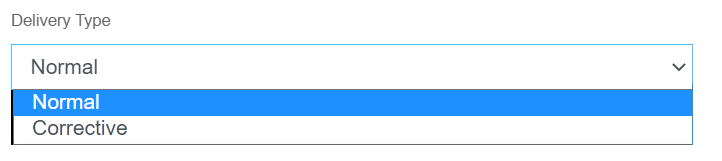
Delivery Type - Deliveries can be of two types.
- Normal
- Corrective
The first step when creating a delivery is to decide what type of delivery is to be made (Figure 1.3). For regular deliveries, select 'Normal' type delivery. In special situations where a fix needs to be delivered on a delivery which is already deployed in the customer's use place, the 'Corrective' delivery type can be used.
 |
|---|
| Figure 1.3 - Delivery Types |
Delivery Baseline
Delivery Baseline is the baseline delivery on which the new delivery will be based on. The new delivery will be applied on top of the selected delivery baseline (Figure 1.4). Delivery baseline can be either the initial delivery or a recent delivery.
 |
|---|
| Figure 1.4 - Delivery Baseline tag |
Target Commit / Branch
Target commit is the commit tag which should be made into a delivery. This could be a sanity tag for a Normal delivery or, a delivery tag in case of a Corrective delivery.
For Normal type deliveries, all sanity tags which are newer than the selected Delivery Baseline will be shown (Figure 1.5). Select the one preferred. The most recent sanity tag will be automatically selected.
 |
|---|
| Figure 1.5 - Target commit |
For Corrective type deliveries, the matching delivery tag will be shown if a branch with the same name as the baseline delivery tag is also available in the Build Place's Customer Solution Repository (Figure 1.6). See section Additional Instructions when creating a Corrective Delivery.
 |
|---|
| Figure 1.6 - Target branch |
Delivery ID
Delivery ID is an auto-generated value (Figure 1.7). This will be the unique name of each delivery. The ID follows the format of del-ifs-cloud-<version tag>-<build place ID>-<delivery version>-<datetime in UTC>-OK, where the 'delivery version' will differ between Normal type deliveries and Corrective type deliveries. This versioning difference will be discussed in the next section.
Furthermore, the delivery tag for the delivery being created will also be based on this delivery ID.
 |
|---|
| Figure 1.7 - Delivery ID |
Delivery Versioning
The Delivery version is composed of three sections. They are,
- Major version (A)
- Minor version (B)
- Revision (C)
The delivery version always follows the format 'A.B.C'.
The major version will always start with '1' and increment either when taking a Release Update or when buildhome is recreated.
The minor version will always start with '0' and increment. It will be incremented with each successful Normal delivery creation.
The revision number will always start with '0' and increment. This will only be incremented in case of a Corrective delivery based on a Normal delivery.
eg:
The Initial Delivery of a Build place will be of the format 1.0.0
The next Normal Delivery will have the version number 1.1.0
A Corrective Delivery based on 1.1.0 will have the version number 1.1.1
Once all fields have been appropriately filled, click Order button on the side panel to place the order. A new entry in the Build Place Environments will be created along with a message if the operation was successful.
Additional Instructions when creating a Corrective Delivery
The purpose of the Corrective delivery is to provide the capability to add some 'cherry-picked' changes to an existing delivery. One use case of this would be to fix a bug that was found in the earlier delivery after it was released. The bug had been fixed in the most recent code, but in this case not all the recent changes are required to be applied to the existing delivery, only the fix. The workflow needed to create such a delivery is described below.
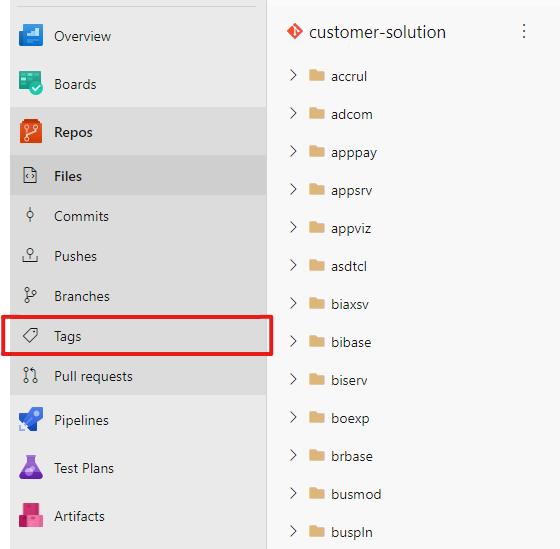
First, the Delivery Baseline to be fixed is to be identified. Once it has been identified, its matching repository tag needs to be found. To do this, navigate to the Customer Solution Repository URL in the Build Place and select 'Tags' under 'Repos' (Figure 1.8).
 |
|---|
| Figure 1.8 - Repository Tags |
All the repository tags will be available here. Please note-down the Successful Delivery tag that is identical to the selected Delivery Baseline. The Delivery tag follows the format of
Delivery Baseline => DB
del-ifs-cloud-<DB_product_version>-<DB_buildplace_ID>-<DB_major_verison.DB_minor_version.DB_revision + 1>-OK.
For example;
if,
the Delivery Baseline is: del-ifs-cloud-21.2.0-gatest7-1.1.0-20210303T103434Z-OK
then,
the Delivery tag: del-ifs-cloud-21.2.0-gatest7-1.1.1-20212315T103455Z-OK
Once the Delivery tag has been found, the Delivery Branch needs to be created from this tag.
The branch naming follows the format: <Delivery Baseline Name>-OK. This branch is for cherry picked changes which should be applied on top of the selected Delivery Baseline.
The branch can be created using the following Git command in the local repository. This option should be available in any popular Git GUI client as well.
git checkout -b <New branch name> <Delivery tag>
Please note that the New branch name should be the same as the Delivery tag.
For example:
if,
the Delivery tag: del-ifs-cloud-21.1.0-gatest7-1.0.0-20210303T103434Z-OK
then,
Delivery Branch name is: del-ifs-cloud-21.1.0-gatest7-1.0.0-20210303T103434Z-OK
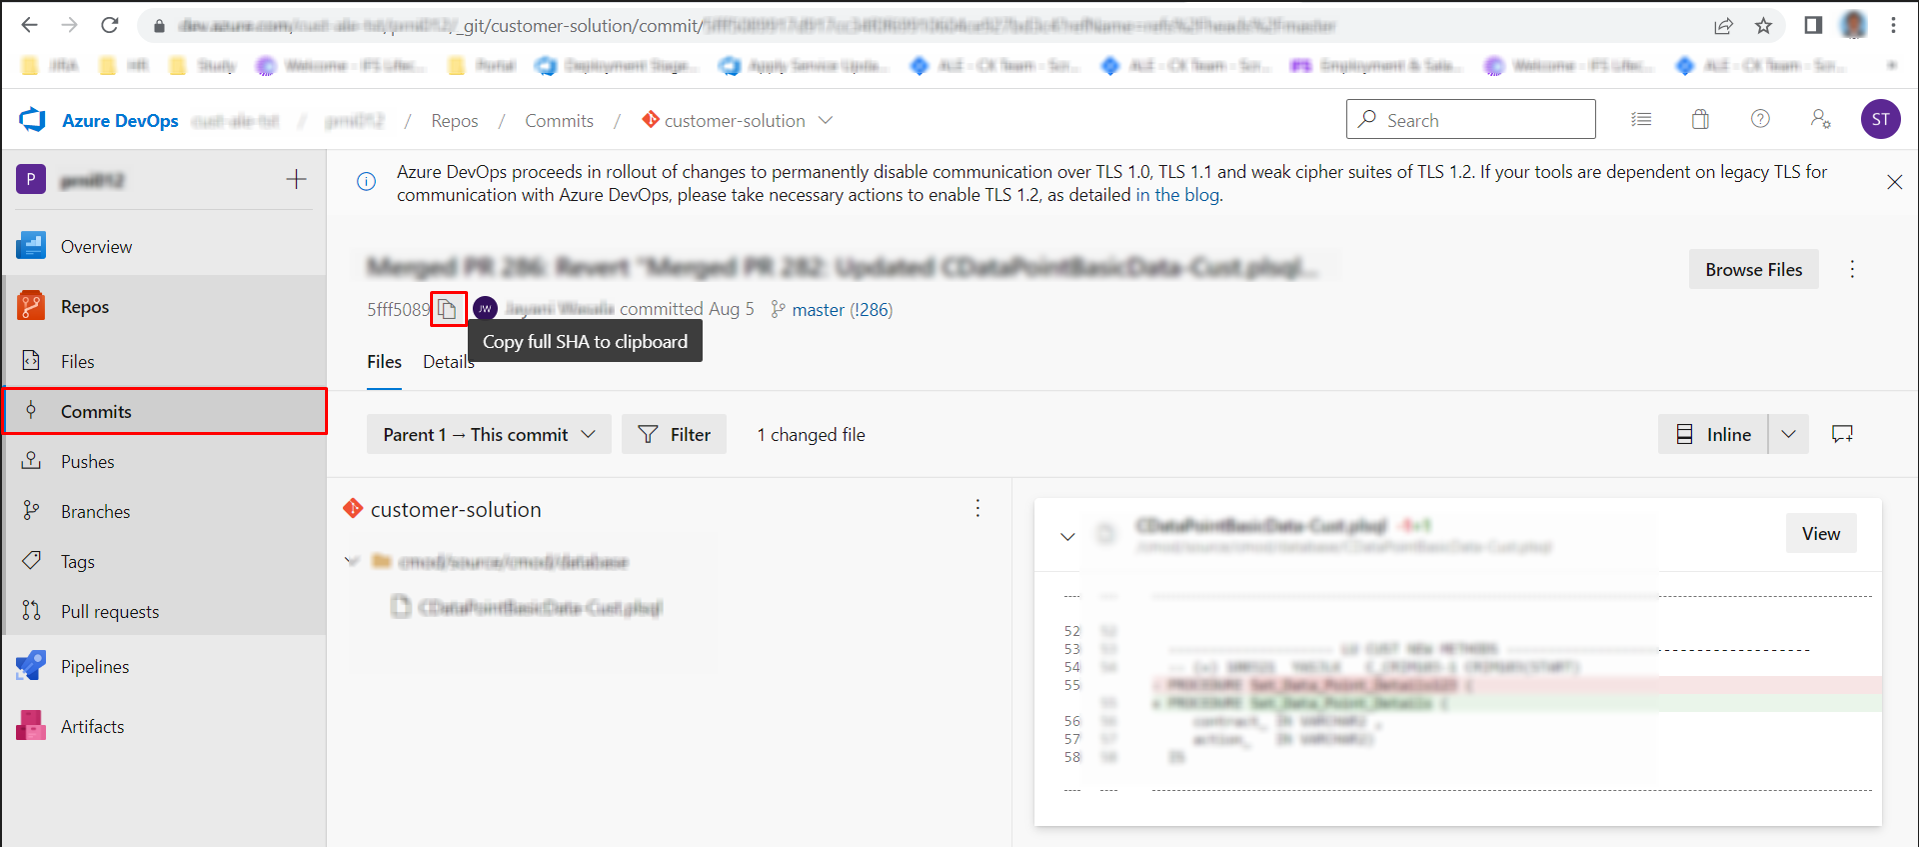
Then using 'Git cherry pick' command, apply the needed changes to the Delivery Branch from the 'master' branch.
git cherry-pick <commit-id>
- For cherry-picking, Commit ID can be copied by clicking on "Copy full SHA to clipboard" icon of the corresponding commit as in below figure from the azure repository commits section.
 |
|---|
| Figure 1.9 - How to copy commit ID |
If there are any conflicts, please refer Resolving conflicts when merging service update as a Corrective Delivery page.
To push the local changes to the remote repository, use below command.
git push origin refs/heads/<delivery-tag-branch-name>:refs/heads/<delivery-tag-branch-name>
It is highly recommended that if any new changes need to be done to support the fix, to do those changes in separate topic branches and then merge them to master branch first. Cherry pick the required changes from the master branch to the Delivery Branch. This way all changes done to the code will be persisted in the master branch.
Once the changes have been finalized, follow the instructions in the "Create a Delivery" section with Corrective type delivery to create the new delivery.
Note: In case of repair script needs to deployed to a specific environment of the Use Place using corrective delivery, Refer Deploying a Correction script on a specific environment on Use Place.