Map Legacy Data Target Table
Once a migration object of a project is connected to a source, user will be able to start map fields or map concatenated fields of a legacy locked table(s) to the fields in target table definition which are in scope (Required to consider both aspects during concatenation, different target tables and different target fields). In addition to that user will be able to override the default values extracted from its target table definition with his own values or values defined under default definitions. Once the mapping is completed data should be transferred to the input container based on the mapping.
When the same target file is mapped twice to a migration object (E.g. Comm_Methods) it will be post fixed with a # followed by its sequence in migration object (E.g.- Comm_Methods#10, Comm_Methods#20). But when transferring data to the input container all data is transferred to a single target table definition.
Once the user select the legacy table name (lister under Legacy Tables with Locked Loads) via the LOV or the enumeration, LOV of legacy table column(s) will show the columns of the respective legacy table. User has the ability to use two legacy table column concatenated in mapping as well. User can map either using legacy table column or legacy SQL column.


Resync Target Fields
This will add newly added fields in target tables and also if new target tables had been added to the migration object those fields will be added as well.
Add to Input Container
Once user click on Add to Input Container, data will be transferred to input container based on the mapping. For easy comparison of data between the data being transferred and data in input container, data is first loaded to a temporary table and then compared to update record statuses in input container. User is allowed to perform meta data validation of the records transferred in the same run.
![]()
Smart Mapping
In all Data Migration Tools, there is a need for mapping old Table Structure to new Table Structure. This is a cumbersome work but with the new Smart Mapping feature in SDM, this work is simplified and much more efficient.
This is command in the header. By using a field name comparison function, Smart Data Manager can suggest what fields that should be mapped together. The user can decide how accurate the comparison needs to be for the suggestions.
The comparison is based on edit distance similarity. The Edit Distance, or Levenshtein Distance, test measures the similarity between two strings by counting the number of character changes (inserts, updates, deletes) required to transform the first string into the second. The number of changes required is know as the distance. The edit distance similarity function uses the same method as the edit distance function to determine the similarity of the strings, but it returns a normalized result ranging from 0 (no match) to 100 (complete match).
-
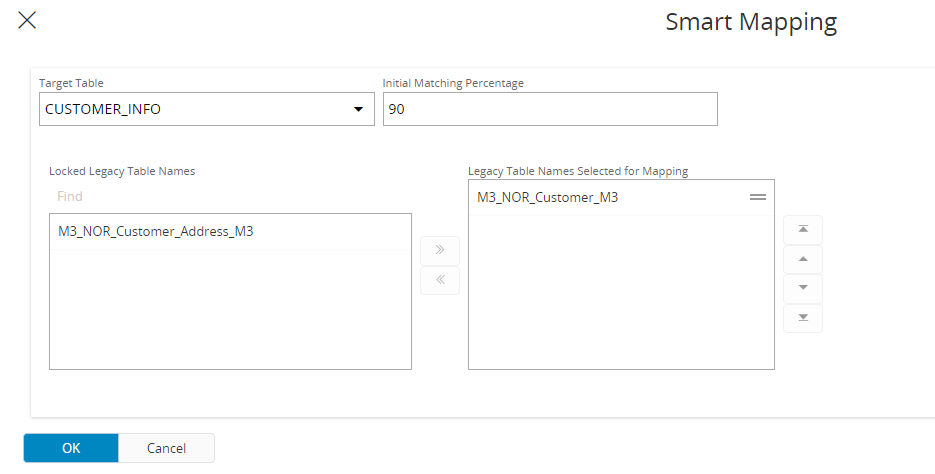
It starts by creating the Mapping header and connect what Legacy Tables should be mapped against what Migration Object.
-
Then the Smart Mapping defines what Legacy Table to be mapped to what Target Table and the percentage accuracy that should suggest what fields should be mapped.
-
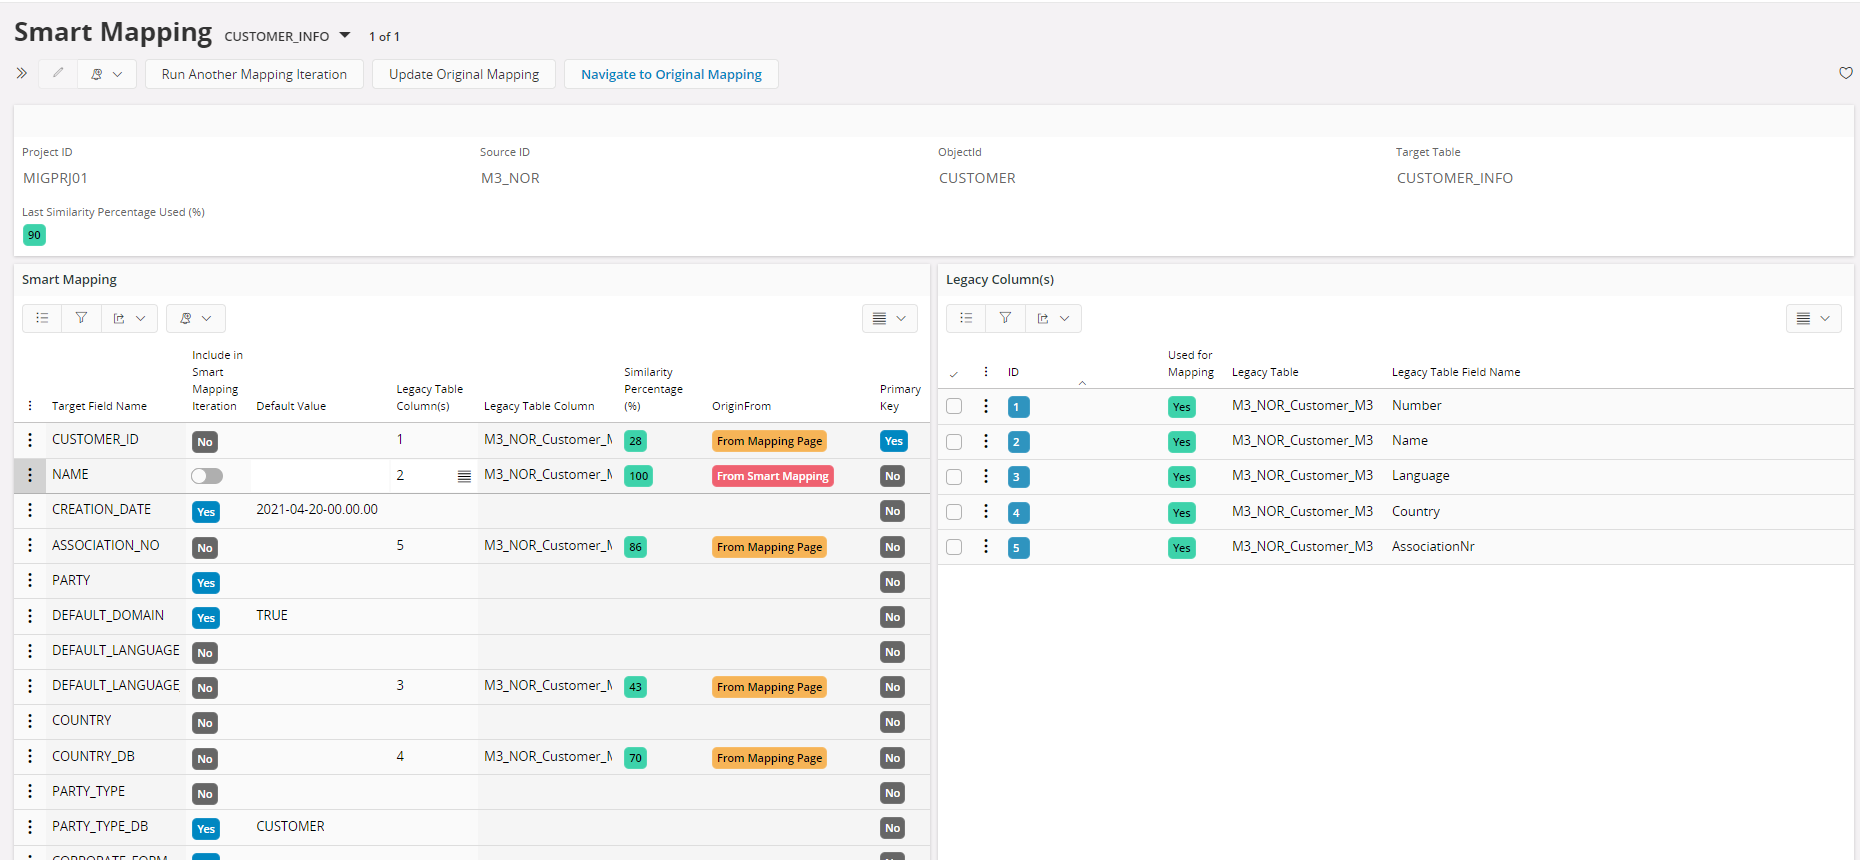
Smart Mapping automatically suggest what fields that should be mapped together.
-
These suggestions can be modified as well as adding manual mapped fields or Default values.
-
Panel to the right, shows what fields has been mapped and what still needs to be mapped.
-
Mandatory flags column highlights what needs to be handled as a minimum.
-
Once everything is finalized, using Update Original mapping, original mapping can be updates. If not can find more matches by executing Run Another Mapping iteration by giving a different percentage value.
Import and Export Mapping
Mappings needs to be done per Migration Object and Source. In some cases, the same mapping would have to be done multiple times. It could be that several sources are using the same Legacy System and now they all needs to be mapped. Or standard mappings from an earlier IFS Apps Release could be created to be used for customers wanting to migrate from that environment to IFS Cloud.
In these cases, it is possible to create a mapping and then export it as an external file. Then import it and it will automatically create the Legacy Tables and the Mapping details needed to perform the mapping. Only thing needed is to import the Legacy Data into the defined Legacy Tables per Source.
Export Mapping
Using this option in the header level, the user can export the exiting mapping to a text file and import it to a different project in the same environment or to a project in a different environment.
It can be exported to the client or server.

Import Mapping
Importing an Exported Mapping requires a Migration Object including the same Target Tables as in the Exported Mapping, to be in Scope and with Definitions created.
It will then create:
- Locked Legacy Tables
- Legacy Table Header Definitions
- Mapping Header connecting Migration Object with the Legacy Tables
- Mapping Details.
And it is ready to be used immediately.
Using this option in the header level, the user can export the exiting mapping to a text file and import it to a different project in the same environment or to a project in a different environment. This option in available under the Mapping in Smart Data Manager navigator.

Steps that should be followed is
-
Select the relevant project, source, and the Migration object
-
Select the import Mapping Option
Replace All - Creates completely a new Mapping and existing mapping will be overwritten if exists.
Merge and Override - Adds new lines, existing mapping values will be overwritten if a similar mapping is found but also keeps old lines that is not included in the Import file.
Merge and Keep - Keeps the old values and only add new lines that didn't exist before.
-
Fill the import File details File can be loaded through client or through a Database Folder
-
Select the load option to run online or background