Migrate data into Custom Logical Units
A Custom Logical Unit can be used as standalone information, or as basic data to be referenced from other standard or Custom Logical Units. When transferring data from one Environment to another, Application Configuration Packages can be used to transfer the Logical Unit Structure. But it cannot be used to transfer data for relevant Custom Logical Units. Therefore, Data Migration process satisfies above requirement by giving the opportunity to transfer the data for Custom Logical Units between different environments.
The following steps describe about how to migrate data into Custom Logical Units.
- Create a Migrate Job by navigating to Solution Manager-> Data Management-> Data Migration -> Migration Job.
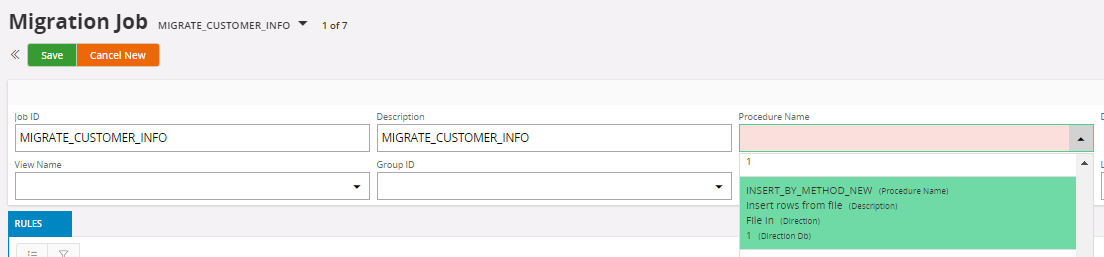
- Choose the relevant Procedure name.
-
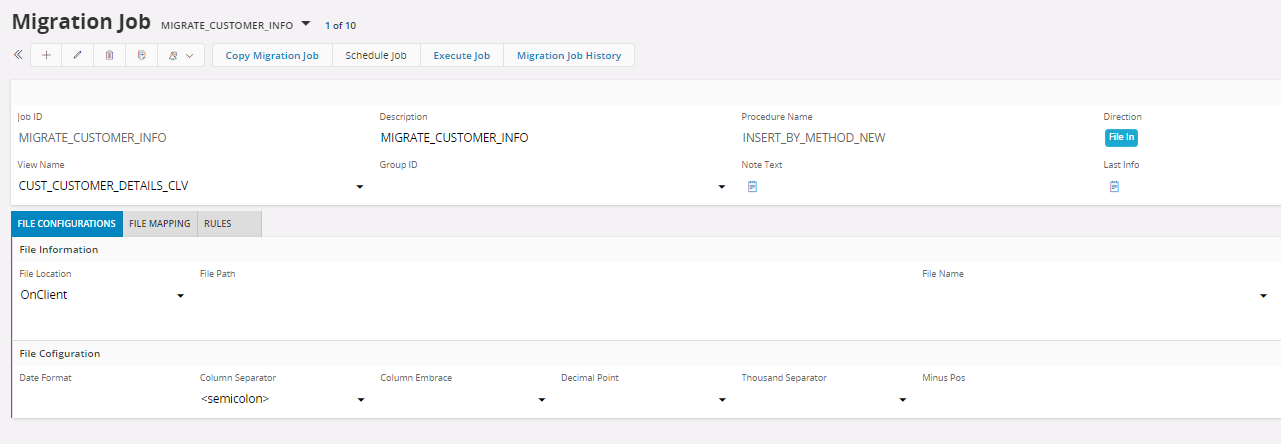
Select the File location as On client. INSERT_BY_METHOD_NEW, INSERT_OR_UPDATE, CHECK_BY_METHOD_NEW,MIGRATE_SOURCE_DATA and EXCEL_MIGRATION procedures have the same configurations as in Normal Logical Units.
-
Provide the Custom Logical Unit view that has been created as the value for the View Name.
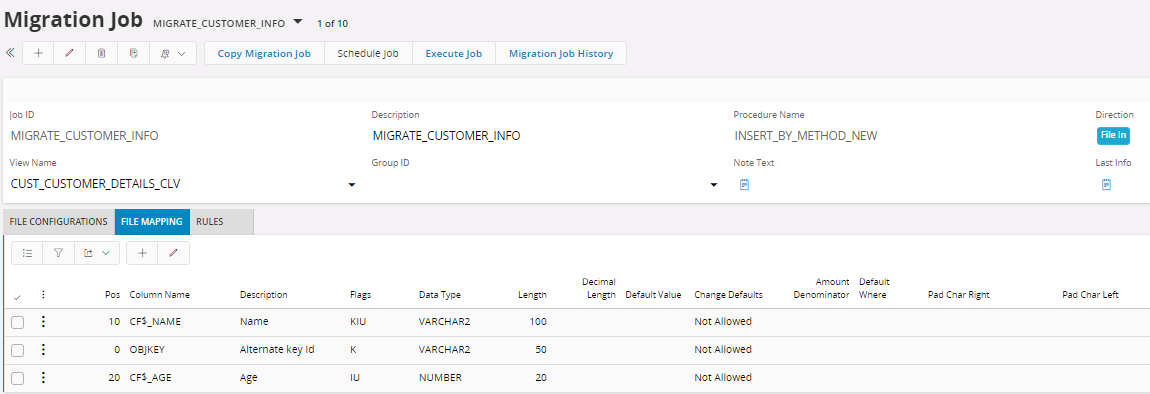
- Go to the File mapping tab and define the order of the column by assigning a number to Pos Column.
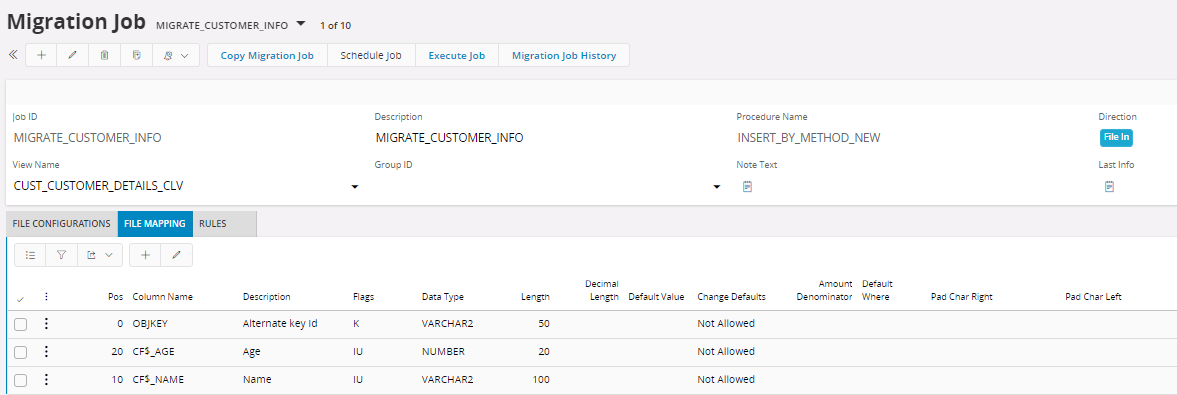
- Object key is the unique identification used for Custom Logical Units. But if we take two environments with the same data into consideration,the object keys can be different for the same record. Hence if the user does not define a key logically during the migration process,the migration job will take the object key as the key and this could lead to data duplication. In order to avoid this issue, users are encouraged to add a key during the migration process and not to use the object key for that purpose.
For example, CF$_NAME can be treated as the key since the name value is unique.
User cannot apply a key flag to these columns directly and edit the Flags column. If the user wants to change a column as a key column, then it needs to be duplicated first. After duplicating the record Flags can be modified accordingly. Refer the below screen.
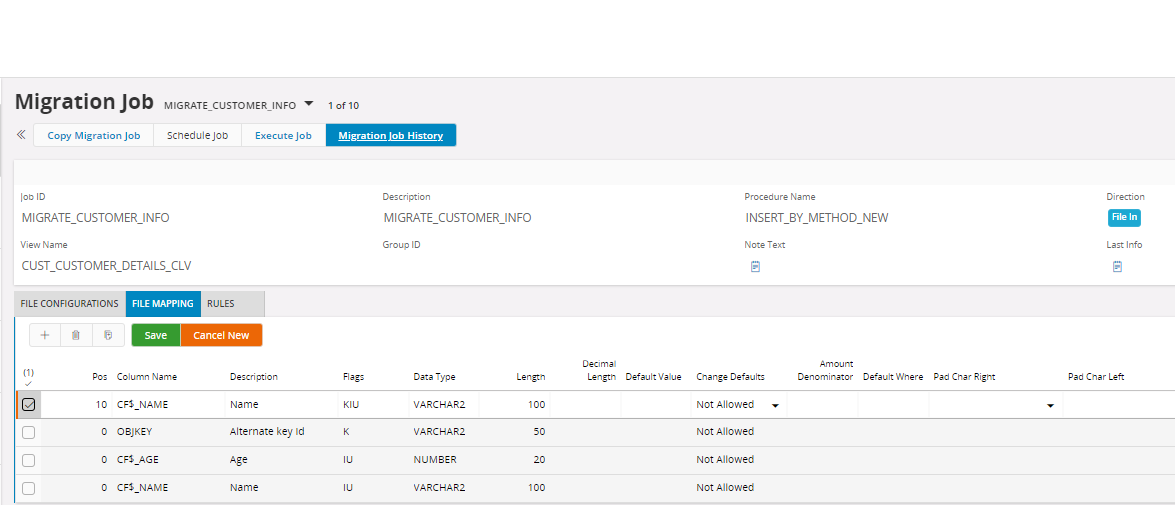
- After changing the flags remove the previous record.
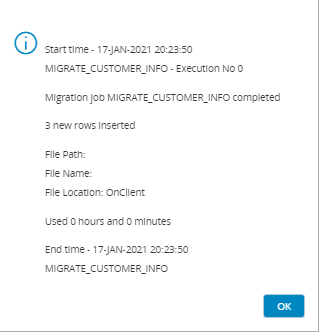
- Start the Job and load the data file using detail tab. User can see the information Message after the data being added. Data have been added after skipping the first row according to the rules.
 9. Navigate to the Custom page and see the results.