Custom Indexes for Data Mart Sources
This page provides information how to create custom indexes on Data Mart sources.
Note: The predefined administrator role BA_ADMINISTRATOR has access to this page.
For more general administration information please refer to Manage Data Mart Sources.
General
Data Mart sources are either Materialized Views or ordinary tables. There are two major advantages using Data Mart access instead of online access:
- The content is evaluated and ready, meaning that all types of joins, lookups and function calls have been executed to create a result set that is fast to access.
- Performance related indexes can be added to support different access needs and Data Mart related indexing is far safer than trying to index core tables that the information is initally retrieved from.
Index definitions are to some extent handled during development of Information Sources, i.e. the Marble models can have index definitions that leads to creation of indexes during deployment/installation. These indexes are typically Primary Keys and unique indexes that are found necessary during development. Other indexes are harder to handle during development since it is rather hard to know how the data sources will be used.
The solution for this is the possibility to manage custom specific indexes via the Aurena client.
To reach this functionality there are two navigation possibilities, both targeting the Custom Indexes for DM Sources page.
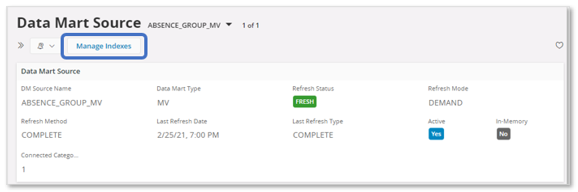
- Using the command Manage Indexes in the Data Mart Source page
- Using the navigator entry Custom Indexes for DM Sources.
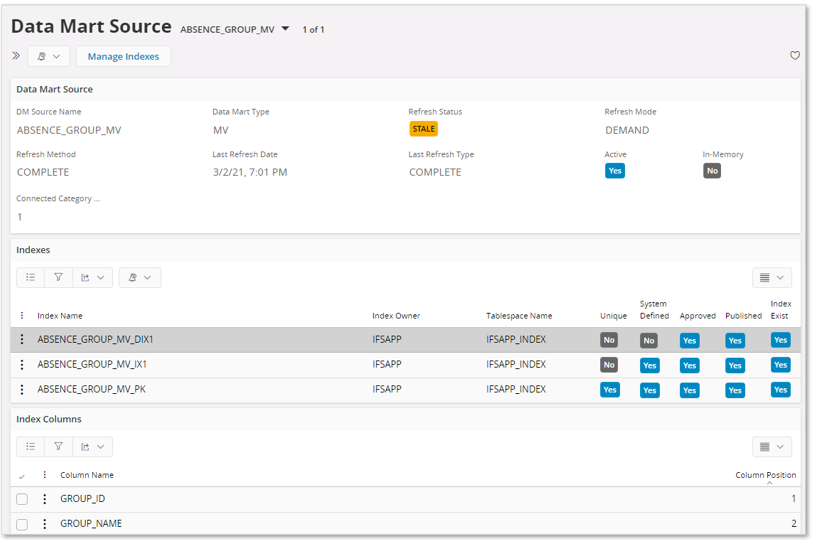
Note: All indexes, system or custom defined, associated with a Data Source can be seen in the Data Mart Source page
Managing Custom Indexes
Custom indexes are handled using the Custom Indexes for DM Sources page.
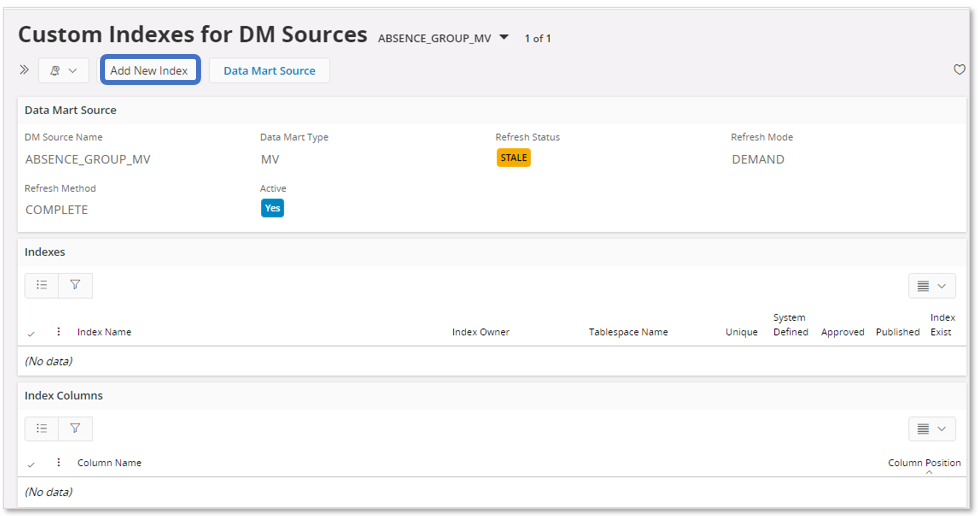
The page displays general information for the Data Mart Source and in the Indexes group, all associated custom defined indexes are displayed. For each index the associated index columns are displayed in the Index Columns group.
Use the Add New Index command to open an assistant that handles the creation of a custom index.
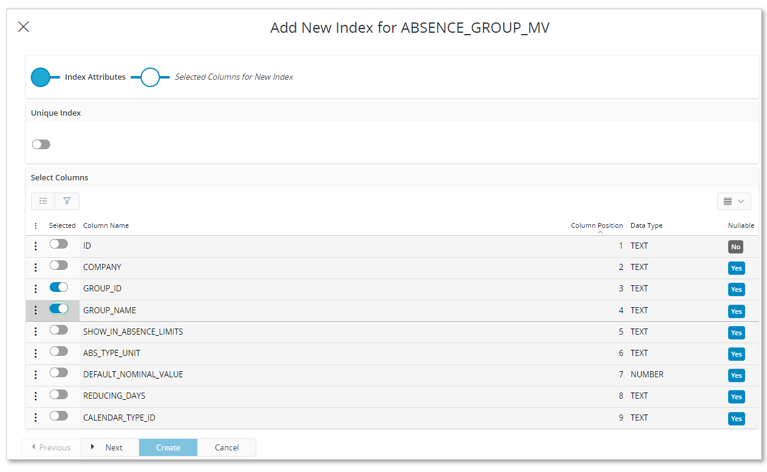
In the first step:
- Choose whether a unique index or not shall be created.
- Select the columns to be included in the index.
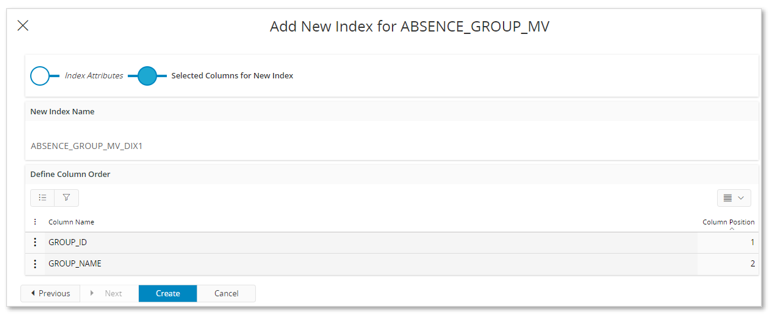
The next step displays the generated, non-editable, custom index name and the included index columns. This step can be used to modify the column position of the index columns.
End the assistant by pressing Create. The custom index definition for the selected Data Mart Source will now be saved.
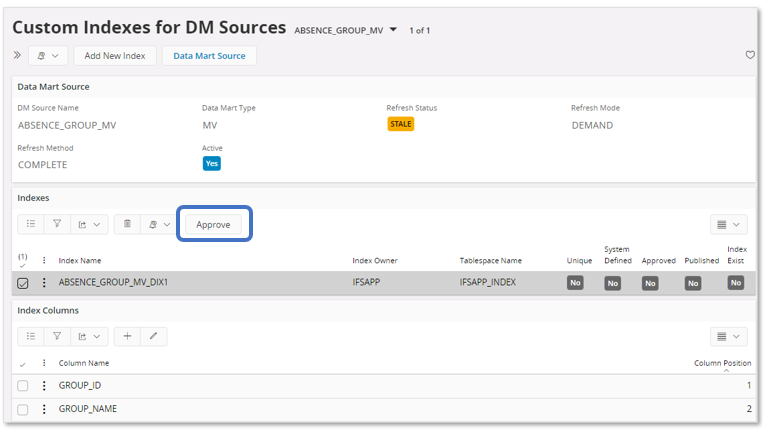
Note: The index will not be created directly. It is necessary to Approve and Publish the index definition first.
After having created the view definition, the next will be to Approve the definition.
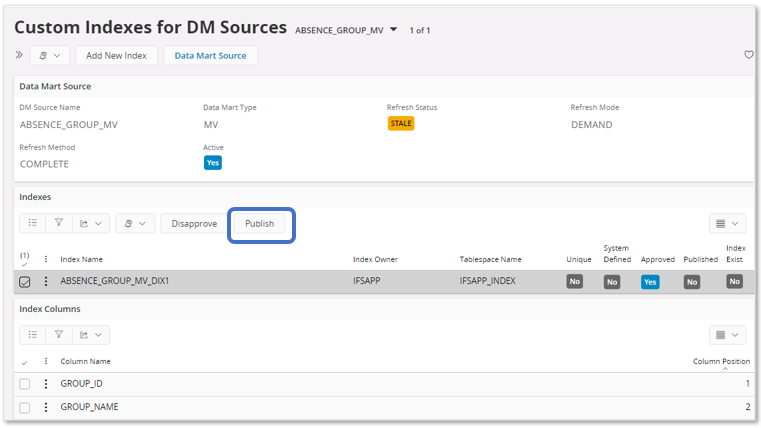
The last step is to Publish the index.
Also, if the index definition is Approved, the command Disapprove can be used to cancel the approval. This action also removes the index from the database.
When the definition is published, the index will be created in the database.
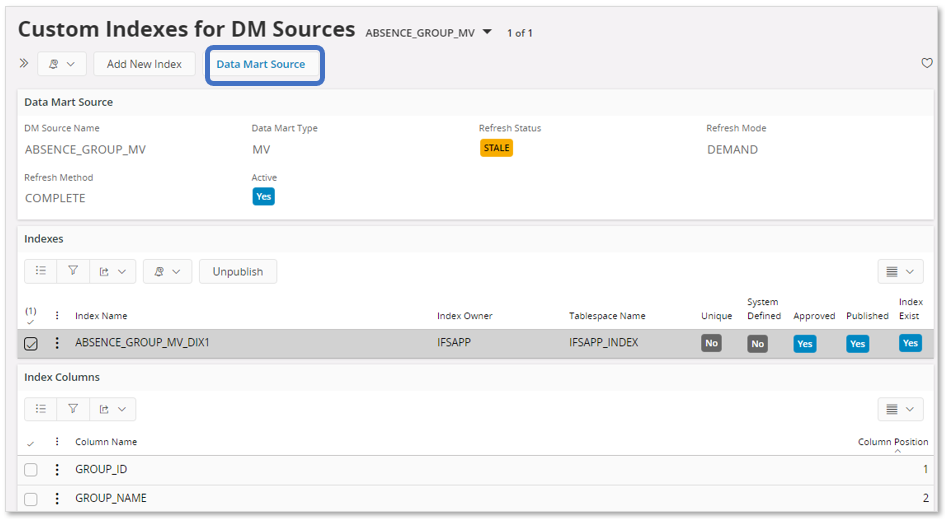
As can be seen above, the Custom Indexes for DM Sources page lists the created custom specific index and its columns but also provides the following information:
- Unique
Indicates if the index is a unique or non-unique index. - System Defined
A system defined index is typically defined during development and created during installation or possibly created as part of a customization project. Else it is a custom defined index, i.e. created using the Custom Indexes for DM Sources page. - Approved
Indicates if the index definition is Approved or not. Only Approved indexes can be published. - Published
Indicates if the index definition has been used to create the index in the database. - Index Exists
Indicates if the index exists or not. It might happen that a custom index for some reason has been removed, e.g. if the source table or Materialized View gets recreated manually outside of the expected/required installation process. If the indicator shows that the index does no longer exist, recreate it by first performing Unpublish and then Publish it again.
The Custom Indexes for DM Sources page also provides the command Data Mart Source that will navigate to the Data Mart Source page, where all available indexes for the data mart source are displayed.
Summary:
- Creating a Custom index
- Use the Add New Index assistant to define the index.
- Modify column positions if needed.
- Use Approve to verify that the definition is ok. Now in Approved state.
- Use Publish to create the custom index in the database. Now in Published state.
- Removing/Changing a Custom index
- Use Unpublish to remove the index from the database and to change the state from Published to Approved.
- Use Disapprove to make the definition non-Approved.
- Change and Re-create
- Make changes as e.g. column position order, deleting index columns, adding new columns and then perform Approve and Publish to create the index again.
- Remove
- Remove the definition using standard remove.
Miscellaneous Information
Installation Related
During a process where an existing installation is upgraded/updated, database storage objects related to Data Mart Sources might get recreated. This means that all indexes will be dropped. The installation process will however make sure to recreate all custom indexes registered as being published. If the index creation fails, the indicators Published and Index Exists can be used to find out if published indexes are really existing in the database. Also find some corresponding information in Monitoring section.
Monitoring
The Application Monitoring Console page can be used to find custom index definitions registered as being published but that have not been created in the database due to errors.
The entry to look for is registered in the Application Monitoring Entries.
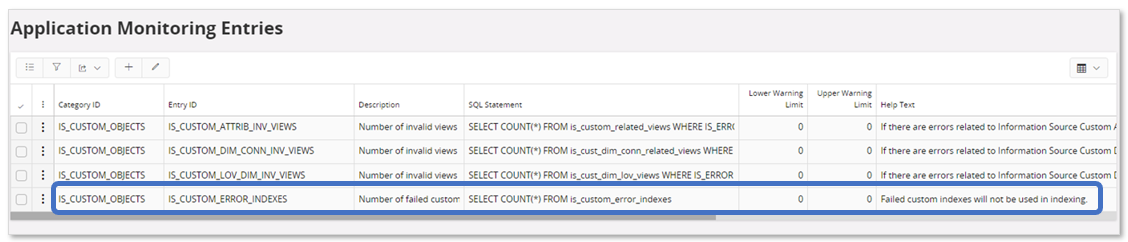
The Category ID = IS_CUSTOM_OBJECTS and the Entry ID = IS_CUSTOM_ERROR_INDEXES.