Apply Release Update to Customer Solution Repository and Customization Uplifting Process
Overview
This section describe the process of migrating release update code from customer baseline repository to the customer solution repository and the process of uplifting customizations
Pre-requisite
-
Release update should have been fetched to the baseline repository (Refer Fetch the Release Update to Customer Baseline Repository.
-
IFS Update Analyzer downloaded and installed on the users' workstation. The tool can be downloaded from the IFS Developer Portal.
Process
During fetching release update to the build place Fetch the Release Update to Customer Baseline Repository release-update branch will be created in the customer solution repository from the selected delivery tag. Release update code can be applied to that branch using the following steps.
-
Clone customer solution repository.
git clone <customer-solution-repo-url> -
Change directory to the cloned folder.
cd customer-solution -
Add Customer Baseline repository as an upstream to Customer Solution repository
git remote add upstream <customer-baseline-repo-url> -
Create and checkout a topic branch based on release-update branch.
git checkout -b <topic_branch_name> origin/release-updatee.g.:
git checkout -b topic-ru/vinvlk/RU-ALE-01-ReleaseUpdate,21.2 origin/release-updateNote: Use proper naming standard as mentioned in Naming Standards to use when working with GIT. If not branch may not be listed in environment ordering dialog.
-
Pull from upstream (i.e. from Customer Baseline repository release-update branch)
git pull upstream release-update -X rename-threshold=95Sometimes VI editor(Figure 1.1) will be opened up during the auto merge process of the git pull command. In that case press "Esc"(Escape key) then ":q!" to quit the editor without saving.
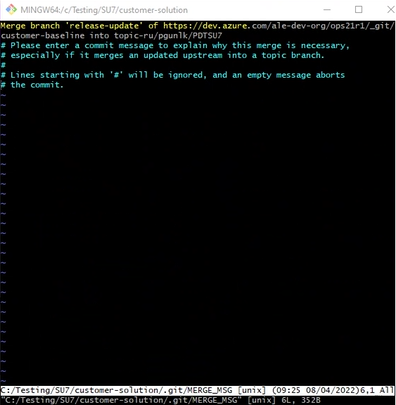
Figure 1.1 - Git VI editor Follow the below steps if the customer solution repository contains customizations.
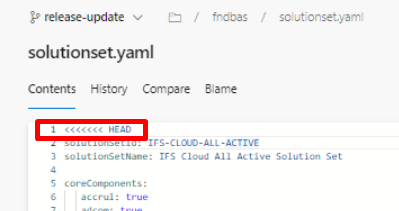
- Run git diff command. If there are merge conflicts, the output will contain '<<<<<<< HEAD' tag as mentioned in the below image (Figure 2.1).
git diff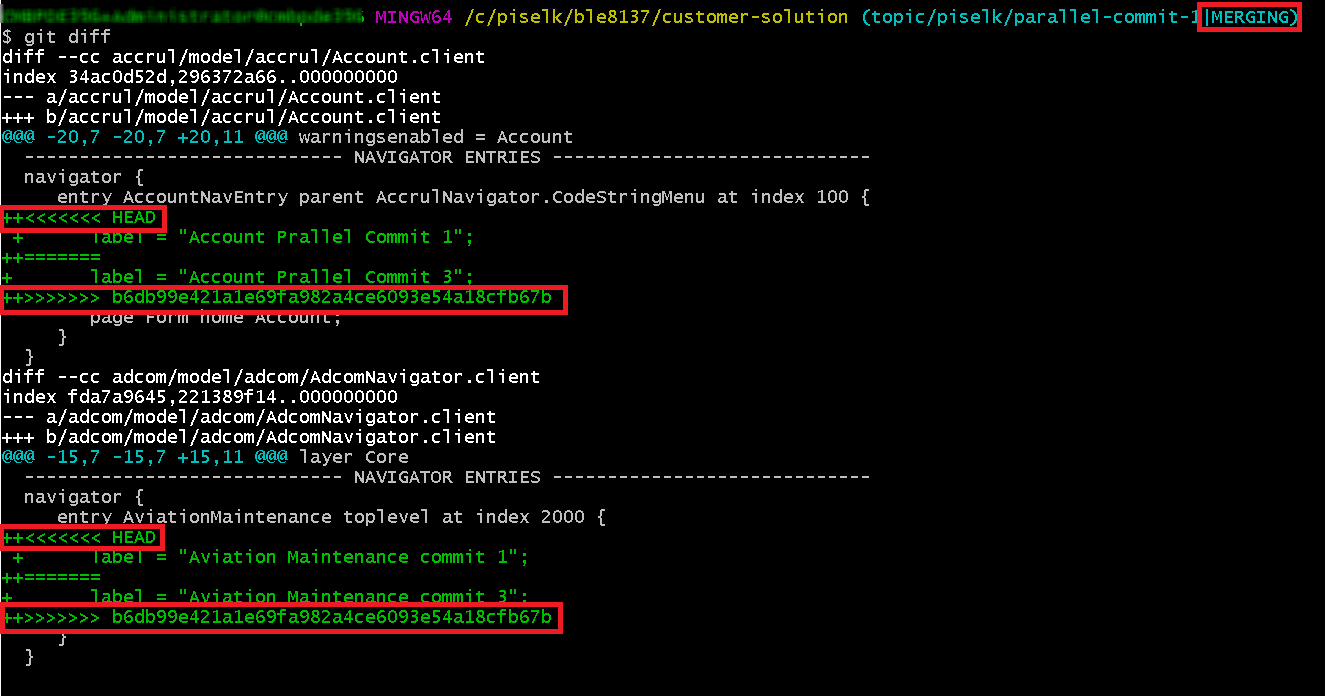
Figure 2.1 - Git diff output when there are merge conflicts - Run Update Analyzer to identify the impacts
When you pull the upstream to apply the release update into topic branch, you may get merge conflicts from modified and unmodified files. In that case resolve only the real conflicts occurred to core files (non-layered) due to the customizations, by looking at the Update Analyzer result. However, Update Analyzer will list both impacted layered and non-layered files. Do not manually resolve the other conflicted files (unmodified files). Then run the below git commands.
- Stage the manually resolved files individually. eg: git add accrul/source/accrul/TaxBook.plsql
git add <path_to_conflicted_core_file>- Run the following command to accept all incoming changes from upstream master to resolve the rest of the conflicts on unmodified files.
git checkout --theirs *- Carry out required changes identified by Impact Analysis run to uplift customizations. Refer Developing with IFS Developer Studio for more information on how to use Developer Studio tool for this.
- After resolving conflicts and carrying out the required changes identified during the customization upliftment, run the git diff command. You will get an output as below, highlighting the removed and added contents (Figure 2.2). This output log should not contain any '<<<<<<< HEAD' tag.
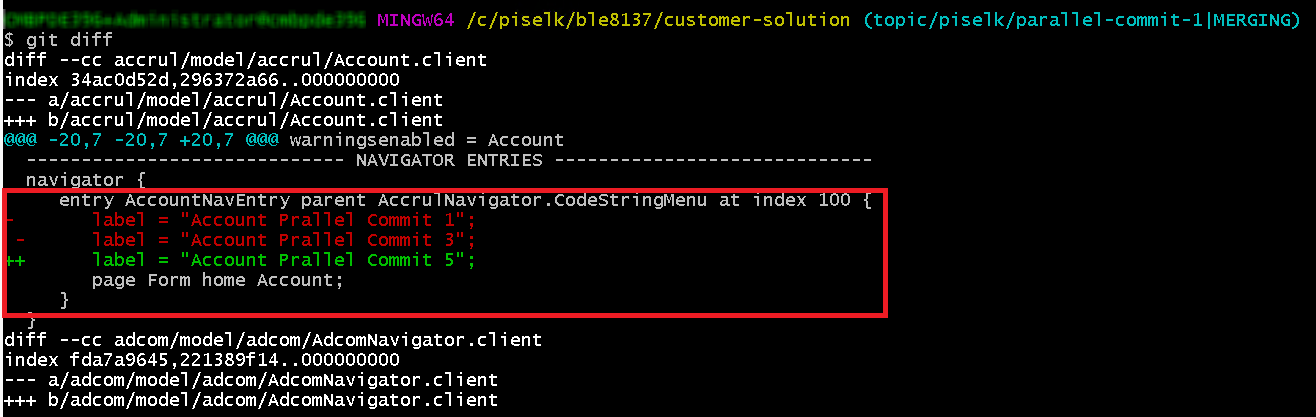
Figure 2.2 - Output when there are new changes and no merge conflicts - Continue from the step 6
Follow the below steps if the customer solution repository does not contain customizations.
Even though there are no customizations in the customer solution repository, merge conflicts may contain in the solution-set file. If the local repository contains conflicts after running pull upstream release-update command, git terminal log should contain a warning message as mentioned below (Figure 3.1).
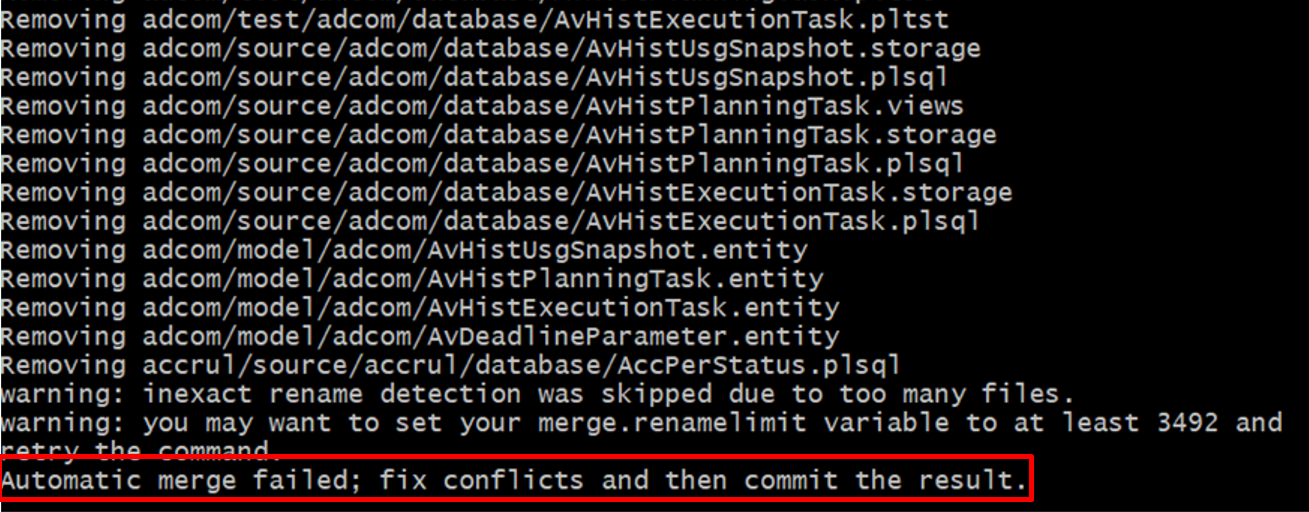
Figure 3.1 - Git terminal log message for merge conflicts Therefore, follow these precautions to avoid merging the topic branch to release-update branch with merge conflicts.
- Identify if there are merge conflicts (Figure 3.2)

Figure 3.2 - Branch name when there are merge conflicts - Run git diff command. If there are merge conflicts, the output will contain '<<<<<<< HEAD' tag as mentioned in the below image (Figure 3.3).
git diffFigure 3.3 - Git diff output when there are merge conflicts - To accept all the incoming changes run the below command (Figure 3.4)
git checkout --theirs *
Figure 3.4 - Git accept all incoming changes - After accepting all the incoming changes, ensure that there are no merge conflicts. If you get an output as below (i.e with no <<<<<<< HEAD tag, Figure 3.5) by running git diff command, you are good to go.
git diff
Figure 3.5 - Output when accept all incomming changes - If additional changes have been done during the time of resolving conflicts you will get an output as below, highlighting the removed and added contents (Figure 3.6).
Figure 3.6 - Output when there are new changes and no merge conflicts Move changes to the remote topic branch
-
Git add, commit and push local changes (Refer Naming Standards to use when working with GIT for the commit message naming standard)
git add .git commit -m "meaningful commit message"git push origin <topic branch name>- Once the merge conflicts have been resolved, the status of the branch will be changed to the normal state as shown in Figure 4.1.

Figure 4.1 - Branch status when conflicts have been resolved -
Test the changes using a baseline environment or a topic environment.
Follow the below steps to Create the Pull Request
-
Before creating the pull request, check if the version in the version.txt file has been updated to the version that that the buildplace is being updated to. In Azure Devops project repository, go to the correct topic branch that you are working on. Then
- Go to "fndbas" component
- Go to "source" folder
- Check if the version of the version.txt has been correctly updated
-
Create a pull request from the Azure DevOps project. When performing this step, you may notice that Master branch of the Customer Solution repository will be automatically selected in the dropdown (Figure 5.1). switch the master branch into the release-update branch before creating the pull request as shown in Figure 5.2.
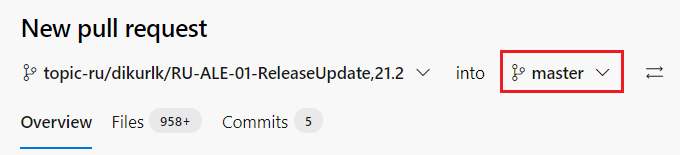
Figure 5.1 - Merging the topic branch to the master branch of the Customer Solution Repository 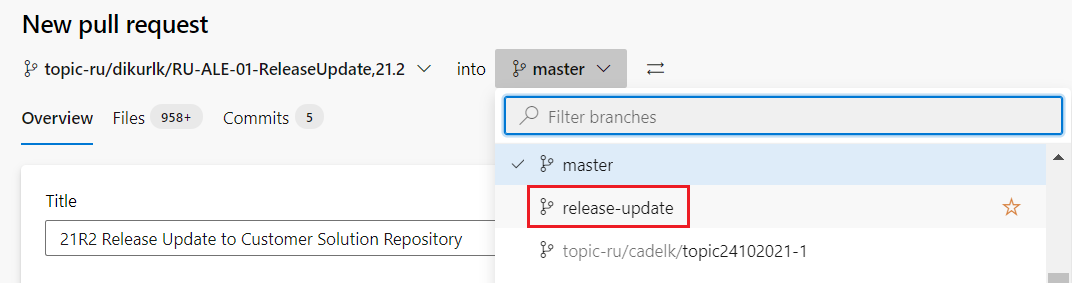
Figure 5.2 - Selecting the release-update branch to merge from the dropdown - Once the branch is switched, the PR should appear as shown in Figure 5.3.

Figure 5.3 - Merging the topic branch to the release-update branch of the Customer Solution Repository Note: Please refer [What to do when there are merge conflicts in the PR?] if you get merge conflicts in your pull request
Note: Before reviewing the Pull Request reviewer should ensure if the developer has created the PR pointing to the correct branch.
Note: Make sure to add a meaningful Pull Request description that is relevant to the commits contained in the PR. This will be included in reports generated by the portal.
Follow the below steps to Merge the Pull Request
-
The next step is merging the topic branch to customer-solution repository release-update branch.
Note: Once the pull request is approved, before completing the Pull Request, check if the PR merge option chosen is "Merge (no fast forward)" (Figure 6.1) . Do not select other merge types, as the repository will end-up with a lot of merge conflicts when getting future service updates or release updates and repository will end-up in an unmanageable state.
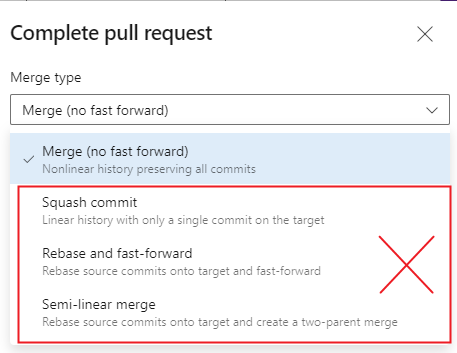
Figure 6.1 - Pull Request merge options Check if the versions in the buildplace are correctly updated
-
Go to the RU studio and check whether the version tags are correctly updated after merging. Sample images are shown below (Figure 7.1, 7.2).
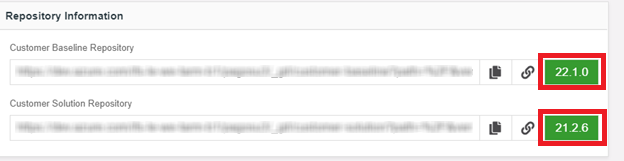
Figure 7.1 - Buildplace repository versions before merging the release to customer solution repository 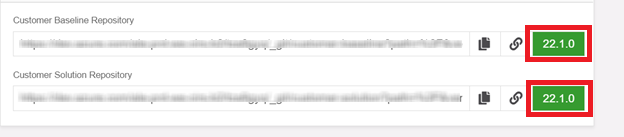
Figure 7.2 - Buildplace repository versions after merging the release to customer solution repository Delete remote and local topic branches.
-
Delete the remote topic branch from the azure repository (Figure 7.3).
Note: Don't delete the branch if a topic environment has been ordered pointing to the topic branch used to apply the release update, is in progress
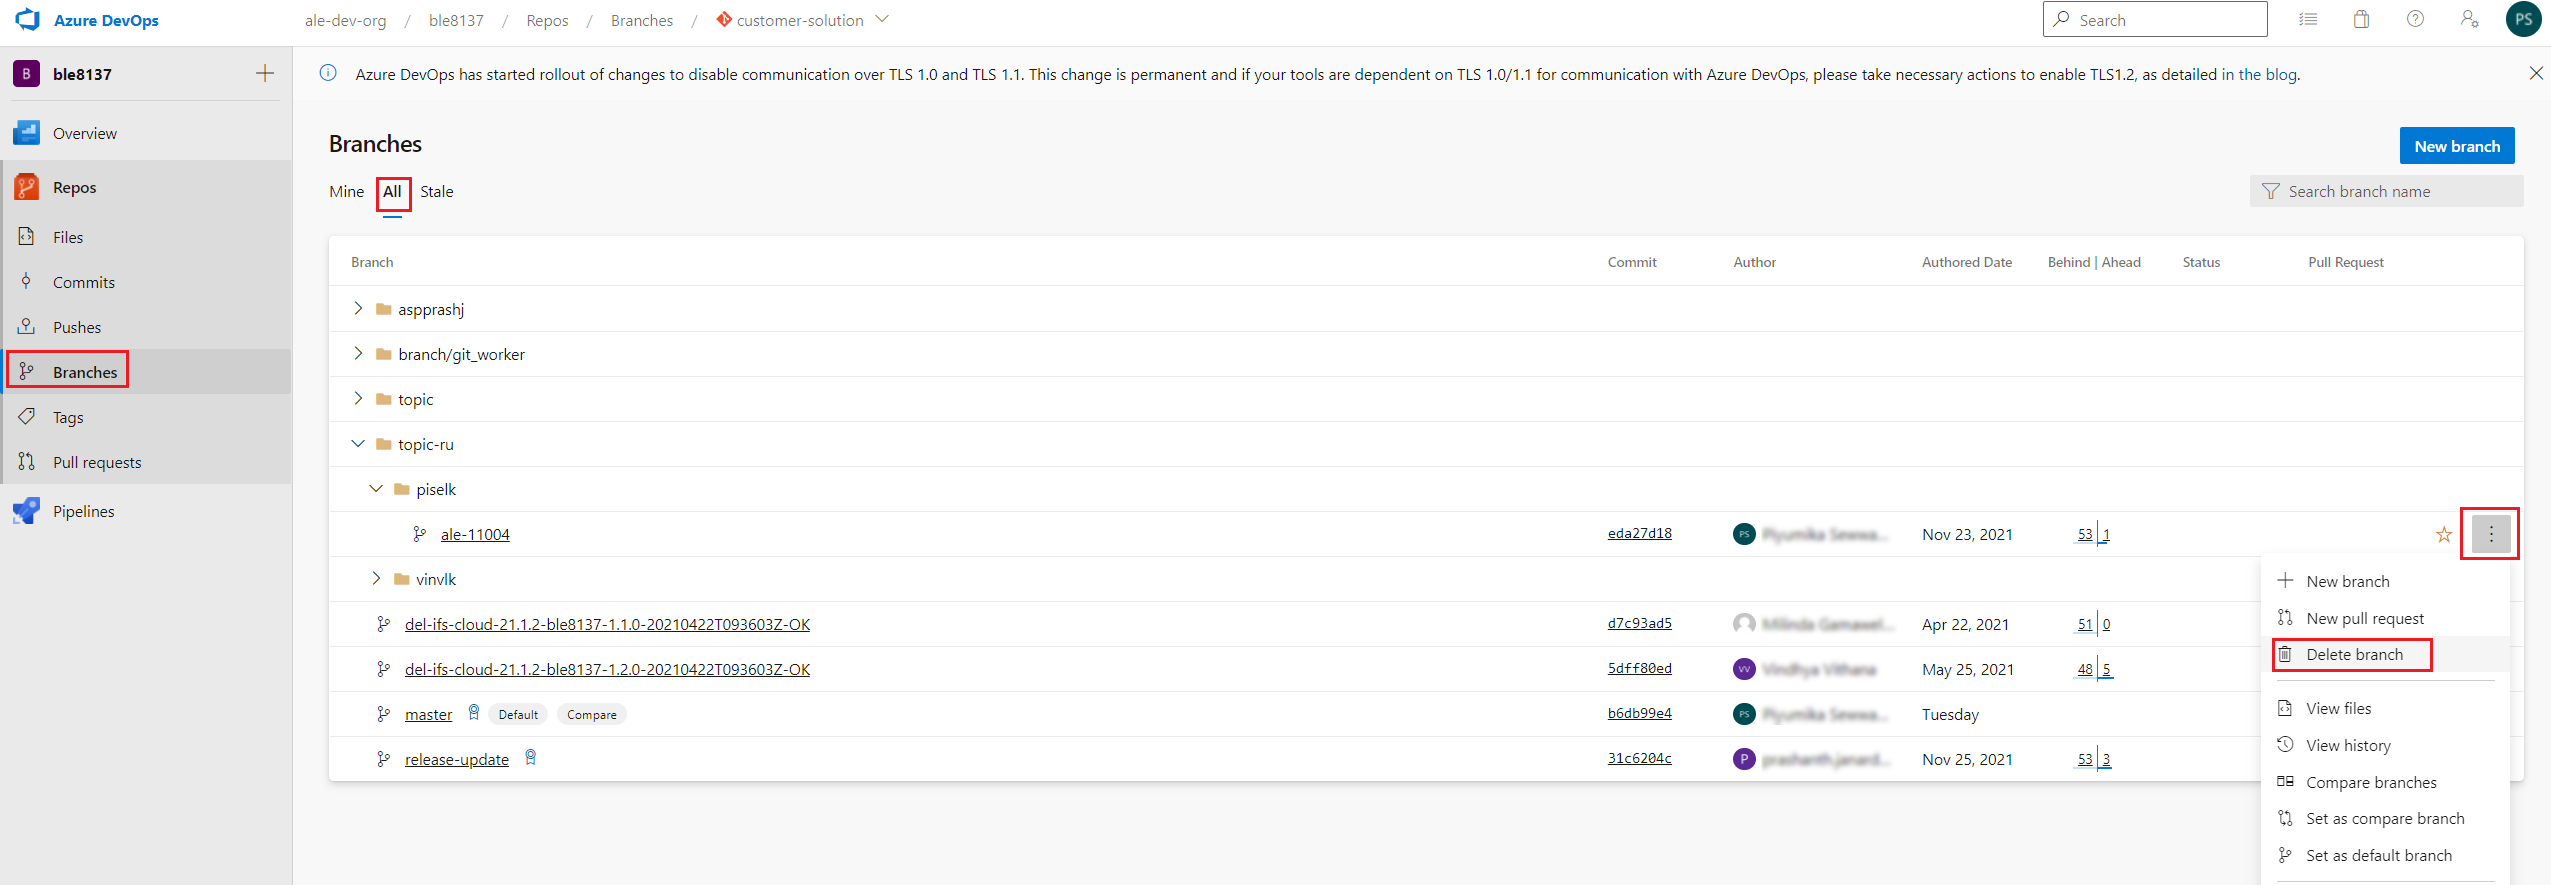
Figure 7.3 - Delete the remote topic branch
What to do when there are merge conflicts in the pull request?
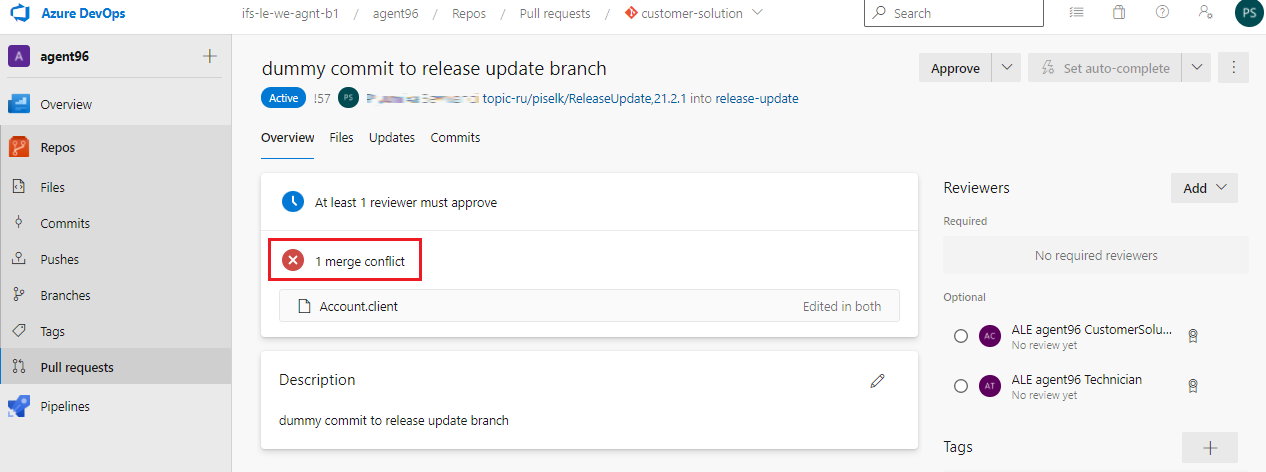
When you created the pull request to merge the release update changes with the customer solution repository release-update branch, there can have situations were merge conflicts occur between the changes of release update topic branch and the new changes in the release-update branch added by parallel branches. ( i.e. when your topic branch is not up-to-date with remote release-update branch ) (Figure 8.1). In that case before merging the pull request, we advice you to follow the below steps.
Note: Do not rebase the topic branch with release-update branch, as the repository will end-up with a lot of merge conflicts when getting future service updates and repository will end-up in an unmanageable state.
 |
|---|
| Figure 8.1 - Pull Request merge conflict |
- If you are already in the release update topic branch you can skip this step.
git checkout <branch-name>
- Then pull the changes from the remote customer solution repository release-update branch to the local release-update branch to be up-to-date with the remote release-update (Figure 8.2).
git pull origin release-update
 |
|---|
| Figure 8.2 - Git pull origin release-update command |
- Resolve merge conflicts if exists.
git add .
git commit -m "commit-message"
git push origin <branch-name>
Now the pull request will be updated with the release-update branch changes.
What to do if the code has been merged with conflicts?
Sometimes there can be situations where the code has been merged to release-update or master branch with conflicts during the apply release update to customer solution repository stage or apply service update process. This will cause both the sanity build and topic environment creation fail during code generation. Usually this happens when there are no customizations and user assumes that there will not be any merge conflicts due to not having customizations. But there can be situations where contain merge conflicts in the solution-set file. You can find the log folder of the failed sanity build or topic environment creation by going to the log view. There you can find the log folder and download it.
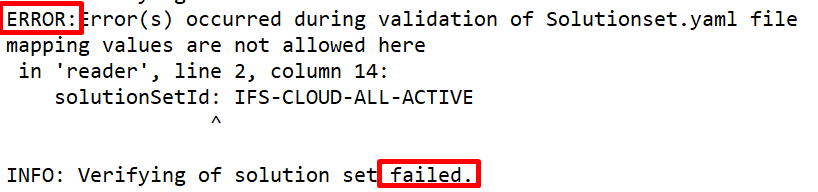
For an example, if the sanity build has failed due to the merge conflicts, download the log folder named as "sanity-build-error-full-logs.zip" and go to "\ifs\cbs\code_generation" location and open _ifs_ant_generateddb.log file. There you will see error messages (Figure 9.1) and head tag as below (Figure 9.2).
 |
|---|
| Figure 9.1 - Code generation error message |
 |
|---|
| Figure 9.2 - Conflict with head tag |
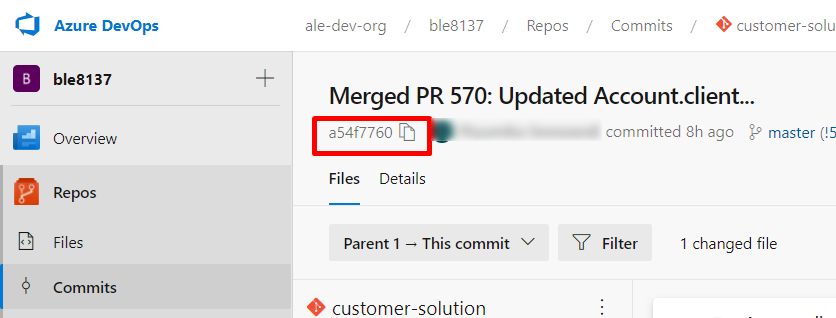
According to the error message you can find the file you have committed with conflicts. Then raise a support ticket with all the failed log files , information with the screenshots and the commit SHA of the commit point where you want the repository reset back to, immediately.
How to get the commit SHA:
- Go to the azure customer solution repository
- Switch to the correct branch (master/release-update)
- Go to the commit point where you want the repository reset back to (probably the point before the commit with merge conflicts)
- Copy the value as mentioned below and paste it in the description of the support ticket (Figure 9.3).
 |
|---|
| Figure 9.3 - How to get the commit SHA |
When multiple developers working on customization uplifting process
This section describes the process for uplifting customizations by multiple developers.
- Follow the step 1 to 6 in above section
- Skip the step 7 and 8 and follow step 9 to push the topic branch created in step 4 to the customer solution repository
- All developers share the topic branch created in step 4 to uplift customizations
- Developers can deploy the code and test the changes either using a baseline environment
- Topic environment can also be used to test the changes once all the build errors in the topic branch are fixed
- Commit the local changes to the topic branch by following the step 9 in above section
- Once all the customizations are uplifted follow step 10 and 11 in above section